The best (and worst) mountain bike upgrades under £100

While it's easy to lust after a new bike or eye up big-ticket items such as a new fork or wheels, it's possible to radically improve your ride with some well-chosen upgrades, even on a tight budget. We've singled out some key upgrades that'll give you change from £100 - and we've named the bits that you shouldn't bother with.
- Buyer's guide to mountain bikes - get the best bike for you and your budget
- 11 tools every home bike mechanic should own
- Buying your first mountain bike: everything you need to know
The best upgrades for under £100
1. Tyres
Tyres are the only interface between you and your bike and the ground, which makes them the single most important bit of kit on your bike in our opinion. While many people write them off as just the round and black things on your wheels, there's a huge difference between cheap tyres and the good stuff.
Manufacturers often cut costs by speccing cheap tyres made from hard compound rubber on their bikes. That means you'll always struggle to get the grip you need, no matter how fancy your bike's suspension or however powerful the brakes are.
Spending a bit more will get you a softer, multi-compound tyre which will give a good mix of high grip and low rolling resistance, plus improved puncture protection and control from better casings. The difference is especially noticeable in the wet, as a decent tyre will have you tracking true over terrain that's terrifying with a ropey budget item.
Expect to pay: £50-70 per tyre
- Buyer's guide to mountain bike tyres: get the right rubber for your bike
- Review: Specialized Butcher 2.6" GRID 2Bliss tyre - bargain big hit rubber
- Michelin Wild Enduro Front Magi-X 27.5x2.4" tyre review
-
ontinental Der Baron Projekt 2.6 tyre review
2. Go tubeless
If you're refreshing your tyres, then it's the ideal time to covert over to tubeless, if you haven't already. Unless you're constantly changing your tyres, a tubeless setup helps to reduce punctures to an absolute minimum, often allowing your to run lower pressures for greater traction where suitable.
Many bikes now come with tubeless ready tyres and rims from the factory, which makes it a simple case of buying some tubeless sealant and valves to ditch the innertubes. Even if your rims aren't tubeless ready, it's possible to convert many rims using a rimstrip kit, which consists of a roll of tape that you used to create an airtight seal over the spoke holes in the bed of your rim. Most also include valves and some sealant and while it's not 100% guaranteed to work first time, it's worth a go.
If you really want to save money, we've had good results taping up rims with Gorilla Tape or even plain old electrical tape before popping a valve in.
Expect to pay: £2.50 for some tape, £19 for a Joe's NoFlats tubeless rimstrip kit
- Dynaplug Racer tubeless repair kit review
- Is it worth converting your mountain bike to tubeless?
-
Airshot Tubeless Inflator
3. Bigger bars and shorter stem
Many bikes leave the factory with a bar that's too narrow for proper control and an overlong stem that puts way too much weight over the front of the bike, hampering control for technical riding. Moving to a broader bar and a shorter stem is an easy way to liven up the steering and improve handling, especially on more difficult terrain.
Opinion varies on just how wide you should go when it comes to bars, but we reckon 740-760mm is good for a trail bike, while those with broad shoulders or fast-and-technical intentions should plump for 780-800mm. It's worth remembering that you can cut down your bars, but you can't add width on, so it's a good idea to go wider than you think - if you don't like it after a few rides, break out the hacksaw. Renthal's 780mm Fatbar and 740mm Fatbar Lite are a popular choice and some in a load of different rises.
Moving to a short stem will speed up steering response and also allow you to position your weight further backwards on steep descents, but a radical change in length can also upset the handling balance of your bike. For most trail bikes, a stem in the region of 50-60mm is about right, while on enduro style machines - or frames with enough reach - it's possible to go down to 30-40mm.
Expect to pay: £40-70 for a set of quality aluminium bars, and the same again for a stem
4. Service your suspension
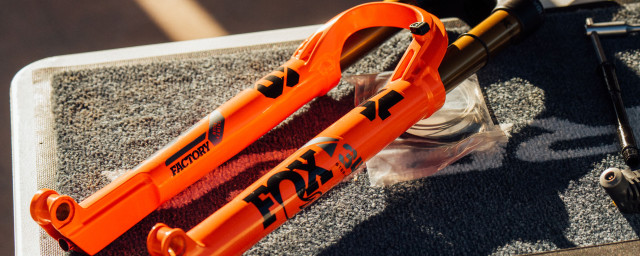
While a quick look at your chain will tell you whether it's in need of attention, it's easy to overlook your suspension and it's hard to notice a slow degradation of performance over time. However, a quick service of your forks and shocks - usually just a case of cleaning seals and adding lubrication - can revitalise how they feel and perform for a tiny fraction of the cost of new units.
If you're a halfway competent mechanic it's possible to do a basic service yourself. A quick 15-minute fork lower or air can service will make your suspension feel much nicer and also extend its lifespan. All you'll need is the correct lube and the right tools, plus a seal kit if you want to change those at the same time
If you're not confident about DIY work, then it's worth asking your local shop if they can do smaller jobs, but you'll need to send it to a suspension specialist for a complete overhaul, which will usually cost a little over our £100 limit, depending on the work needed.
Expect to pay: £5 for a DIY fork/shock lower lube, £30ish for a basic service at a shop, plus around £20-40 for a seal kit.
5. Upgrade your brake pads and rotors
If you're lacking stopping power, a quick fix is to increase the size of your disc brake rotors. Many bikes come with relatively small 160mm rotors, but moving up to 180mm or even 200mm items will significantly increase the amount of power on offer. All you'll need is a new disc brake rotors and the correct disc brake mount, so it's a cheap and easy upgrade. The only downside is that your brakes will be a bit more grabby, but you'll soon get used to that.
While you're changing your rotors, it might also be worth changing your pads. We've had useful increases in power and feel with some aftermarket pads. If your bike has soft 'organic' or 'resin' pads as standard then moving to harder, longer wearing 'sintered' or 'metallic' pads can improve the lifespan and performance in heavy duty use, though this can be at the expense of feel and noise.
- Review: Disco Brakes Floating Brake Rotor
- Shimano Saint M820 disc brakes review
-
Magura MT5 hydraulic disc brake system review
Expect to pay: £7-15 for new pads, £20-40 for a new rotor plus £10-15 for a new mount
6. Get more gearing with an expander cog or wide range cassette
If you want to drop a load of weight and complexity, then switching from multiple chainrings up front to a single is an excellent way to do that, but you'll want to have a larger gearing range from the cassette to allow you to still get up and down the hills.
While the latest wide-range 12spd drivetrains such as SRAM's GX Eagle groupset are getting ever more affordable, they're still not exactly cheap. However, you can get a bit more range out of an existing 10 or 11spd setup by using an expander cog. These are basically just big sprockets that you add to your cassette - well, after removing one of the current ones, obviously. OneUp's Expander Cog Kit is designed to be added to a 10spd 11-36T and increases the top end to a much chunkier 40T cog and there are plenty of others out there.
You can also just replace the entire cassette. Sun Race make a range of very affordable wide-range cassettes, with an 11-42T 10spd item as well as an even wider 11-46T 11spd unit, both of which fit to a standard Shimano freehub body.
- Video: Unboxing SRAM's GX Eagle 12spd drivetrain - with weights
- SRAM GX Eagle 12spd drivetrain first ride
- RAM's SX Eagle budget 12-speed mountain bike drivetrain: weights and full tech specs
Expect to pay: £40-80
7. Get a grip that fits
Grips are an often overlooked bit of your bike, usually left completely standard or only changed when worn out or for a pleasing colour. However, the difference in comfort and control between the best and worst grips is huge.
If your bike only has push-fit grips, then moving to the much more secure kind with lock-on collars is a no-brainer, as they stay put even when wet, as well as making removal so much easier.
If you've got great big paws, then moving to a chunkier grip will add comfort. Conversely, a slimmer grip will give those with small hands a much more secure and comfortable hold on the bars, often helping to reduce arm pump on long descents. The sky's the limit when it comes to shape, size and feel, so it's worth giving a few different kinds a squeeze and seeing how your hands get on with them.
Expect to pay: £10-20
- RevGrips Pro Series review
- Deity Knuckleduster lock-on grips review
-
ODI Longneck V2.1 lock on grips review
8. Switch your saddle
While we're doing contact points, if your bum is getting unhappy on long rides, switching saddles can make a huge difference. Different people get on with different styles and shapes of saddle, while many manufacturers now offer them in a number of different widths, so they hook up correctly with your sit bones. Some even allow you to demo a saddle to see how you get on with it before buying.
If you're a female rider that's bought a unisex bike, then getting a woman-specific saddle will make life whole loads less uncomfortable, so it's worth doing that as soon as you can.
While it's possible to spend a load of cash on a fancy carbon railed saddle, some of our favourites, such as the Fabric Scoop, offer loads of comfort without the big price tag.
- Buyer's guide to mountain bike saddles: everything you need to know
- Review: Fabric Line saddle
- DMR OiOi Saddle review
- SDG Duster MTN Ti-Alloy saddle review
Expect to pay: £35-70
9. Posh bib shorts or liners
While most mountain bikers wear baggies, our roadie brethren have been keeping the really good stuff to themselves, namely high-end road bib shorts. While many baggy shorts come with a liner short included, they're usually not of a particularly high quality.
A nice set of roadie bib shorts have a number of benefits. First up, a bib short really helps hold the chamois in place, so it doesn't bunch up or move about as you ride. Having the extended back also means that dirt can't get in the back of your shorts, preventing a loamy bottom. Finally, quality bib shorts have really well-made padding that manages to be comfortable without being bulky, designed, as they are, to be sat on for hundreds of miles.
It might seem like a bit of a luxury to spend so much on a single item of clothing, but once you've tried the bottom cosseting of posh road shorts it's hard to go back. Unless you regularly ride a number of days in a row, you'll only need the one set anyway.
Expect to pay: £70-90
- Gore C3 Windstopper Bib Tights review
- Castelli Nano Flex Pro 2 Women's Omloop bibshorts review
-
Assos XC bib shorts review
The least useful upgrades for under £100
1. Ceramic bearings
Often found in expensive bottom brackets and jockey wheels, ceramic bearings are made from extremely hard silicon dioxide instead of steel. Proponents claim that they offer lower friction and greatly increased bearing life, which is certainly true in the high-speed industrial applications they're designed for, where they can spin at over 20,000rpm without needing friction increasing lubricating grease.
Just how much difference they make in a relatively low-speed cycling application is open to discussion, but even taking the friction savings at face value, they're an incredibly expensive way to save a tiny bit of power, especially on a mountain bike.
2. Titanium bolt kits
Yep, this is another one where the potential weight savings of lightweight things made from exotic materials are massively outweighed by the sheer expense of the damn things. For example, these Hope titanium disc bolts cost a stonking £18, but only save around 5g over normal steel items.
There are plenty of more effective ways to save a lot more weight for a lot less money before you need to turn to these.
3. Carbon bottle cages
If you're not a fan of packs but still want to carry a decent amount of liquid, then bottle cages are the best solution. However, once again there are better places to look at weight saving before turning to fancy carbon fibre cages. This basic Specialized Cascade Il cage costs £8 and weighs a claimed 50g, coming out at 16p per gram. Compare that to their Specialized S-Works Rib Cage II Carbon, which weighs a mere 20g but costs a whopping £55. That's £2.75 per gram. Ouch.
4. Braided brake lines
Braided brake lines promise better braking performance by replacing your normal plastic lines with items wrapped in a strong layer of woven steel. They're often used in high-performance motorsports applications, because the metal outer doesn't allow the plastic line that the fluid runs through to expand as much under high pressures, helping transmit more braking force to where you need it.
While they do make a difference in terms of how your brakes feel on a bike, that's not always a positive thing for modulation, while the relatively short runs on hose on a bike and low pressures at which they work aren't exactly stressing standard manufacturer hoses to the limit anyway. Add in the fact that an errant braided hose can quickly saw through anything it rubs against and we reckon you're best using your money elsewhere.


