Types of mountain bike trail - different trail types and what they mean
There is no mountain biking without trails. Riding on fire roads or farm tracks might be part of mountain biking, but it’s usually just a way to cover the distance between those rewarding sections of the singletrack trail. This guide will help you in getting started with finding the best trails.
- How to start mountain biking
- Best mountain bikes for under £1000 - top-rated budget mountain bikes
- Mountain bike slang - a beginner’s guide to speaking proper MTB
The entire mountain bike industry is geared towards making it more fun for you to discover, explore and ride singletrack trails. Better tyres, more sophisticated suspension and broader ratio gearing all empower mountain bikers to ride further, for longer, in steep terrain. All that makes you also climb more efficiently and descend with greater confidence.
You’ve got comfortable riding gear, which won’t chafe or annoy you on those long rides. Your bike is perfectly configured, with suspension sag and rebound set precisely for your riding weight. But where to ride and how to approach the trails available to riders?
We’ve compiled a trail-type reference guide to educate and empower riders. It’s important to remember that what might be challenging for one rider is easy for another. That’s why trail grading is so important. As a newbie rider, familiarising yourself with the international mountain bike grading system is valuable. Blue is beginner, red is intermediate and black is an expert.
Trail centres
For experienced and newbie riders alike, the trail centre remains a favourite. These can be trails built entirely on private land or a joint venture between private landowners and a government agency, sharing resources.
Trail centres feature some of the best singletracks you’ll find. With strict build parameters to adhere to conservation best practices and prevent soil degradation and erosion, most trail centres feature smooth singletrack, enhanced with skilfully shaped jumps, drop-offs and berms.
The international mountain bike grading system is also widely used at trail centres. This helps new riders avoid the anxiety of accidentally dropping into a trail that might be way beyond their skill level. With riders paying to access trail centres, the owners and management are accountable to specific minimum standards regarding trail marking. That means riders can be confident of the fidelity regarding trail marking, with blue being the easiest, red for intermediate and black for advanced trails.
It’s worth noting that some trail centres will also have a double black diamond line, which contains unavoidable features like large drops, extreme rocks gardens and gap jumps. Unless you have the required skills, double black diamond trails are best avoided, even if you are curious about just ‘cruising down’ them, because you might get in the way of advanced riders who are riding at much greater speed and committed to specific lines.
Trail centres are a great place to learn and progress for newbie riders and advanced mountain bikers. Riders know that they aren’t going to happen upon a ‘surprise’ feature halfway down a specific trail, which might be beyond the trail’s colour grading. If you are a newbie wanting to learn elementary skills, or an advanced rider wishing to progress on a specific jump line, the trail centre is your best resource.
With trail centres adhering to such strict maintenance standards, they are safe to ride after adverse weather and storms, as build and maintenance teams will always walk and sweep the trails to ensure they are clear for riding.
Bike parks
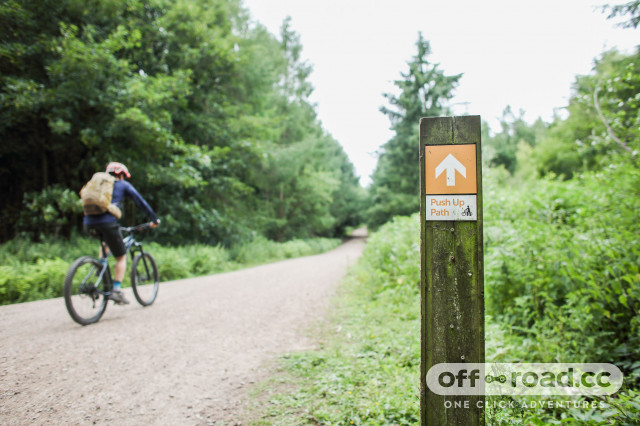
Like trail centres, bike park trails often include man-made trails and features that are usually created using heavy machinery. But what sets bike parks apart from your everyday trail centre is that there will be an uplift service offered, where riders will put their bikes on a trailer and be driven to the trailhead. However, bike parks usually also have a push-up trail, or climb for those who want to save a bit of cash on their entry fees, or those who are fully equipped with an e-MTB.
Bike parks use a very similar trail grading system to trail centres, offering green, blue, red and black trails to cater for a wide range of abilities but it's rare that any of the trails will include a climb or uphill section. Some bike parks may grade their trails a little differently, using one two three white dots surrounded by an orange background. From the get-go, this dot scoring system indicates that a level of mountain biking proficiency is required but just like the colour system, the more dots, the more severe the trail's features are. The dots are often used to denote the difficulty of downhill-specific trails.
At a bike park, riders can expect much faster speeds and bigger features, so it's wise to ride in full protective gear, including a full-face helmet, knee pads, elbow pads and body protection. Also, take things slowly to start with as many crashes happen to those who might be a little overexcited during their first few runs.
Linked trail conservancies
Trail centres are amazing but can be limited in terrain and distance. If you want to test the legs and range beyond your normal comfort zone regarding distance, explore a linked trail ride. These types of trails are found extensively in the USA and South Africa.
Often the work of patient negation and trust, built over years, linked trail conservancies allow a rider to venture across multiple trail constituencies with a single permit. It’s important to understand that linked trail conservancies are often more ecologically sensitive and have more significant stakeholder pressure than a dedicated localised trail centre.
The reward of taking in so much more terrain and distance with a linked trail conservancy also begets greater rider awareness and responsibility. Riders need to stick to the trail and realise that self-sufficiency is required if they have a mechanical. There won’t be a ‘quick route’ back to the trailhead or car park, as with a conventional trail centre.
Many linked trails pass through conservation areas or private land, therefore, riders should always practice excellent trail etiquette and route discipline. This is to avoid infringing on sensitive land or trespassing by accident, imperilling future use and access for others.
Wilderness trails
If you thrive on the challenge of adventure riding and value the experience of raw trails, there’s always the wilderness riding experience.
Wilderness trails are those off-road routes which allow mountain biking but are unmarked and unmaintained. They are mostly traditionally hiking and portage trails.
Independence of mind and confident navigation are required for a wilderness riding experience. Riders must retain a keen sense of their intended direction and be weather aware. While navigating a wilderness trail, getting caught out in adverse weather conditions isn’t ideal.
The reward of wilderness trail riding is its surprise and delight factor. You’ll roll through natural rock gardens and off-camber corners that will test riding skills in a way that structured trail centre descents can’t.
Be aware of the independence required for wilderness trail riding. You need to carry more nutrition, hydration and spares than would be the case on a trail centre ride. And even the best device navigation apps will run out of ideas about where you are when you’re out of signal on a wilderness trail. When embarking on a wilderness trail mountain bike ride, save those maps and routes on your mountain bike’s head unit/computer instead of just relying on a smartphone app.
Natural trails
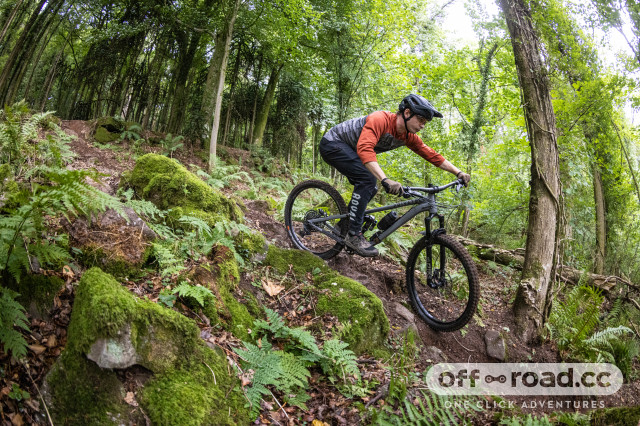
Natural trails, like wilderness trails, are unmarked and rarely maintained. However, unlike trail centres and bike parks, they're created by a single, or a small group of diggers who are passionate about mountain biking, building excellent trails and the local riding community. Natural trails are never built using heavy machinery and they use the land's topography as features.
So when riding natural trails, you may find jumps and berms made using minimal materials in order to make as little an impact on the land. Natural trails are often more technical and have more of a gradient to contend with as these trails are maintained far less regularly. They also change over time due to the impact of storms, or heavy traffic.
It is important to note that most of the time, natural trails are built on land with permission from a landowner and sometimes, that agreement can be very delicate. Disobey the local rules or riding etiquette and you could put that everyone's riding in that location in jeopardy, especially when it comes to building new trails. Sometimes, these trails may also be illegal so put in your research before putting rubber on the trail.
How to choose trails
Mountain biking was always deeply tribal and remained secretive regarding ‘locals’ singletrack for decades. Digitisation and the smartphone have changed all that.
Where you once had to know ‘someone’ to sample a local trail which wasn’t officially part of a trail centre, that’s no longer the case. Apps such as Strava and Trail Forks have nearly all the world’s available trails listed to ride, even listing most of the ‘stealth’ ones.
When selecting a trail, use trail apps to identify what is within your fitness and riding skill. If you get invited to ride a new ‘unofficial’ trail or a ‘sneaky’, ask about its potential difficulty and features before dropping in. Because it’s deeply embarrassing, with potential legal liability, to be medevac’d from an ‘unofficial’ trail built on contested land. That’s why official trails are the safest venue to push your limits and enjoy riding.
Balance the thrill of exploration with the reality of conservation rules and private land integrity regarding trespassing. “It’s cool, we can ride here, I know someone,” is not always valid permission to push onto a trail.
Trail grading explained
In an attempt to make choosing the right trail for you easy, many bike parks and trail centres grade their trails depending on the level of skill required to complete them. It's an identical colour system used in ski that uses green, blue, red and black to denote how difficult or welcoming a rider can expect the trail to be.
Green's the easiest and usually describes family-friendly trails. Blue trails dial things up a bit where speeds increase and the trail will contain rollers and berms. Red trails increase the technical demand and a red trail will usually present smaller jumps and drops. When riding black trails, technical features will be larger and longer, and the jumps and drops will not be rollable at all. They'll also be bigger.
But there's another grade – double black. Double black trails are usually pro lines reserved for only the most confident riders. Most elite-level downhill tracks will be double black.
Some trail centres turn things up to 11 and have specific pro lines that feature huge jumps such as Bike Park Wales' Vanta Line. Only attempt these if you're confident with big airtime.
There is another form of trail grading that you'll find describing old-school downhill trails that use signs with one, two or three white dots against an orange background. Even on single-dot trails, expect technical terrain, jumps and drops but the more dots, the more intense the trail will be.
Trail grading isn't without a caveat – it's not particularly standardised. One venue's black could be another's red. So if you're unsure what to expect, head over to YouTube and look for videos of other riders hitting the trails you intend to ride. Natural trails, however, do not use any form of trail grading system.

