Tips for beginner mountain bikers - MTB hacks to make you faster and confident on the bike
Everything you need to know about starting out mountain biking

Mountain biking isn’t easy, but it is rewarding for those riders who endure beyond the newbie phase. Experienced riders know better, and the best advice is often free. As it should be.
- How many spacers should I install on my bottom bracket?
- Gravel bike vs mountain bike: what are the differences?
-
The best mountain bike jerseys for men - Men's kit tried and tested
The mountain biking community is caring and collaborative. Experienced riders like helping newbies initiate into the tribe.
Nobody wants to make an avoidable mistake. We’ve compiled a reference guide to help you get the best from your mountain bike, during those first few months of riding. You don’t need in-depth mechanical knowledge or expensive tools to integrate our tips.
Mountain bike set-up
If you aren’t riding at the correct saddle height, knee injuries are only a question of time. And no rider wants to trigger avoidable knee issues.
Saddle height is an easily adjustable touchpoint on the mountain bike. You merely need to use an appropriately sized Allen key on your mountain bike’s seat collar to adjust it up or down.

2032 Merida Big.Trail 700-saddle, by Suvi loponen
But how high or low should you go? New riders are inherently nervous about tipping over. That means they often ride with a saddle height too low, because it feels ‘safer’ in relation to the ground. But if you are riding too ‘low’, you aren’t benefitting from ideal pedalling biomechanics.
How do you get into the best possible saddle position without an expensive bike fitting consultation? Your knee should be slightly bent when either pedal is at its ‘lowest’ position, correlating to six-o-clock on a clock. Never at full extension.
Improve traction with lower tyre pressure
Two other mountain bike-set up features that newbie riders can confidently adjust are tyre pressure and suspension sag. These are crucial for optimising traction and bike feedback in technical terrain.
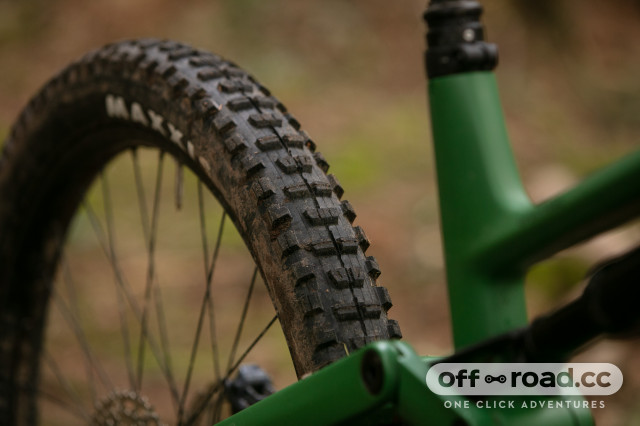
2023 canyon spectralon cf8 rear tyre.jpg, by Liam Mercer
You’ve spent the money on a mountain bike with great tyres and suspension, but those components must be configured at the correct pressures to function optimally. Overinflated tyres will ping you in rock gardens. And be awful to ride on textured trails. It's the same logic with incorrectly configured suspension, which is either rover or underinflated.
But how do you get it right? Many newbie mountain bikers are afraid of flat tyres or damaging their wheels. Hence, they ride with overinflated tyres, to protect the rims from dinging or cracking. And thinking they’ll avoid flats. The issue is that mountain bike tyres must be run at much lower pressures than most newbie riders assume. Why? Because a tyre at lower pressure, will shape and conform to terrain textures like rocks and roots, finding grip instead of getting deflected off-line.

Winter Bike Set Up Tyre Pressures-15.jpg, by Rachael Gurney
You know the pressures need to go lower, but how much lower? Ideal tyre pressure is a function of casing size and rider weight. A 2.4” wide tyre won’t work at the same tyre pressures for a 160lb and 220lb rider. A safe spectrum for experimentation is 20- to 28psi of pressure. It is wise to start in the middle, say 24psi, and inflate or deflate as you learn how your riding weight corresponds to bike balance and feedback on the trail.
But tyre pressure isn't the only pressure
With suspension air pressures, it’s all about sag, which is a weird concept for newbie riders. Sag is the amount your suspension compresses when standing on the pedals, during a descent. Why is it important? Because everyone weighs more or less than each other, so you need to set up your mountain bike suspension to account for that as without correct sag, your like will never work at its very best.

2022 suspension sag fork.jpg, by Liam Mercer
The sag point moves depending on how much travel your suspension has, although the percentage will remain the same unless dictated otherwise by your bike's manufacturer. But some brands, namely RockShox, print sag indicators on their suspension stanchions, making finding the best sag point super easy. But if your suspension doesn't have indicator markings, you can buy a sag indicator tool.
Riding with intent and structure
Your bike set-up is dialled, tyre pressures are where they should be, and those sag markers line up correctly. But what about riding tips?
Going for a coaching session is the best progression any newbie mountain bike can make. A skilled and experienced coach will identify and remedy body position mistakes, in minutes. But not everyone has the access or funds to progress their riding with tutelage, as a beginner.
Some universal riding principles are easy to understand and apply on your trail rides. No matter the sport or outdoor activity, we’ve all had a coach or master athlete tell us the same thing: look up. Your body positioning will shape around visual projection. And in mountain biking, you want to scan far ahead, anticipating features and corners without overfocusing on them.

2022 privateer 141 riding 5.jpg, by Liam Mercer
Newbie riders often make the mistake of getting hooked up on rock features, or stalling in tight switchbacks, because they fixate their vision on them - instead of through them.
Centre of gravity is important when descending any trail on a mountain bike. The lower your body position, the more stable your bike will be. You’ll also be pressuring the tyres into terrain, through the pedals, enhancing grip.
You want to get low and adopt a posture where you can scan ahead, with your head-up, but without raising your entire spine and body, into an upright position.

2021 specialized rockhopper expert corner.jpg, by Liam Mercer
As newbie riders advance, they can experiment with counter-leaning pedal positions. What’s that? Well, it is the principle that your opposing pedal should always be at the lowest position, when rounding a corner. Example? If you are rounding a left-turning switchback, you’d want your right pedal to be at the six-o-clock position.
On-bike nutrition and fuelling
All mountain bikers get excited and overamped on rides and that can trigger the risk of ‘bonking’, by not being mindful of nutrition.
If you are riding for more than an hour, you must have adequate hydration and nutrition. A good rule is to consume a bottle of hydration and a food item for every hour of riding. But there is additional context to this.

2022 Nutrition-11.jpg, by Suvi loponen
In mild to cool conditions, you can ride the same distance and elevation profile with half the hydration you’d need on a summer’s day. Newbie riders often struggle to eat on the bike, but you must develop the habit of consuming nutrition on longer rides. This guards against the disaster of emptying those glycogen stores, and bonking.
Experiment with different snacks to establish what works for your stomach and blood chemistry. Some riders thrive on power bars. Others swear by the merits of Haribos. Those riders given to natural foods might prefer dates or the reliable banana.

2022 merida one forty 6000 bottle.jpg, by Liam Mercer
Snacks are important and personal and the worst idea is to buy something unfamiliar and try it out on a ride, instead of at home. If you get stomach cramps or ingredient intolerance, that’s a lot easier to deal with in the comfort of your own home than having stomach cramps on the local trails, an hour’s pedalling from your car.
You might also like:
Author block