How to take a bike on a plane
Flying with your bike has always been something of a tricky one to master – be that in simple practical terms of carriage or in the form of the interpretation of airline baggage terms and conditions.
[Words by Steve Thomas]
- Is the hardtail the best winter mountain bike?
- Hacks and tips from a lifetime of travelling by bike
- Is big travel necessary for UK trails?
Since the pandemic subsided, most airlines have been doing all they can to recoup their losses from being grounded for so long, and this is a situation that’s unlikely to change any time soon. The upshot is that it now costs considerably more to fly and carry your bike with you than it did in the not-so-distant past.
With this in mind, we rounded out this feature based on a lifelong adventure in negotiating and working around the ever-changing rules of flight engagement. Please read the small print below and be sure to do your homework thoroughly before setting out – it could save you a small fortune.
Flying by numbers
Always be sure to check the latest carrier bike and excess baggage fees before even considering booking with a particular airline. Note how the fees work: some include connecting and codeshare flights - whereas separate flights on budget airlines might require you to pay twice for your bike.
Your bike does not fly as regular luggage but requires to be placed in the oversized compartment, and with many airlines, your massive bike box doesn't count as your hold luggage, but you need to book it separately. If your airline has a specific bike luggage option, you need to use that. Usually, when you are booking your flights you can add the bike bag under the "extra" luggage options, and see the amount it will cost you.
Bike fees can be expensive, sometimes as much or even more than the flight itself or the cost of a hire bike. For most airlines, a bike luggage fee ranges from £45 to £60 per flight but you also get a more generous weight allowance of 30kg.
Airlines such as British Airways count your bike as part of your luggage allowance but this means that you might hit the weight limit of 23kg. And when it comes to the extra weight fees, you might be looking at paying an additional £65 for the additional weight over 23kg.
It is often worth flying with an airline with a lower bike carriage fee or with a better inclusive baggage allowance to save you from the hassle of negotiating extra fees at the baggage drop.
Although we love to hate them, budget airlines can often be best for regional flights, as they have a set fee per bike or oversized weight, and you can also cram in your shoes and other parts to make the most of this without falling fowl of surprise fees at the airport.
If you do get hit with a hefty fee, first try to negotiate. If it’s unavoidable, ask about upgrade options; premium economy or even business class may well be less expensive if you find yourself stuck on the opposite side of the world with your bike – and before any of this do components such as stash pedals in your carry on or pockets and ditch heavy and cheap items.
Listing individual airline policies for each route is difficult but, as a rule of thumb, Middle Eastern airlines often have the most friendly bike/baggage policies, while many European flag carriers have the harshest bike policies.
Boxing clever
When it comes to boxing your bike for travel, a trusty cardboard bike box can be obtained for free or for a small fee from most bike shops around the world. They are a great option, especially if you plan to travel in and out of different airports or are touring.
Many airlines also offer boxes for sale, although you do not want to have to pack a bike at the airport, so it’s best sorted in advance of travel.
Soft padded bike bags are lightweight, roll on wheels and easy to cram into taxis, trains and on busses, and can be folded down and stored when back at home. Their shortcoming is that they don’t offer the best bike protection. If you’re worried about minor cosmetic damage this may not be the best choice.
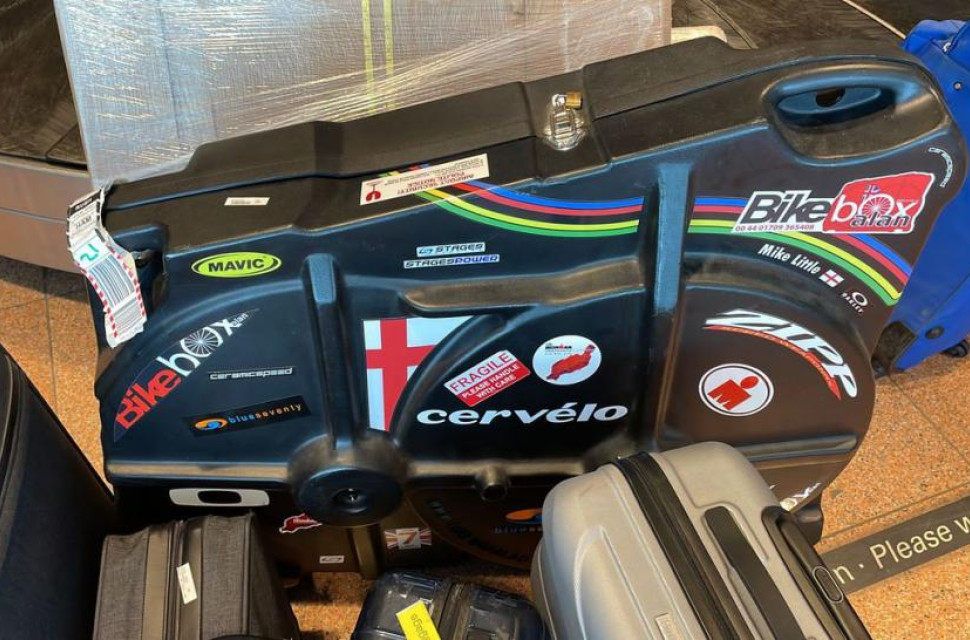
Hard (plastic or resin) bike cases offer the highest level of protection, although they are often heavy (up to 10-12kg) and are extremely bulky. If you’re flying business class (with a higher baggage allowance), have a big enough airport transfer option and are staying in one location this could be a good call - and some of the hard bike boxes require little to no disassembling of your bike which can be a plus.
Zen and the art of bike packing
Keep your bike disassembly for packing to a minimum. If you lose a vital bolt or can’t put something back together then your trip may be over or impacted before it even starts.
Depending on your carriage mode and type of bike, this procedure will differ, although the basics apply to all options.
Remove the wheels and slightly deflate the tyres (not fully, as it can lead to bashed rims). Remove or lower the seatpost (add extra grease to avoid scratches).
Remove skewers/thru-axels and brake discs – if you have them and carry them in your hand luggage to avoid warping. Put cardboard between the brake pads to stop them closing (if they do close, just put a knife or screwdriver between the pads and force them apart).
Remove the pedals and handlebars, turn the forks and stem around and then strap the bars to the forks or top tube (being sure to pad it with foam pipe lagging or bubble wrap, and this all depends on your bike, bars and shifter set up).
Take off the rear mech and hanger, wrap it in a rag (or bubble wrap) and strap that and the chain inside the rear triangle of the frame.
Keep the chain on the big chainring to protect the teeth from the bag/box and try to add a piece of hard plastic or thick foam beneath the chainring when packing.
Season with padding to your requirements and then put the frame into the bag or box with one wheel on either side of the frame, with one towards the front and the other at the rear, making sure that the spokes don’t rub against the frame.
Tips and tricks
The main thing about travelling with your bike is patience. The massive box you are hauling with you will physically slow you down, but you might also expect to spend a little more time checking your bike in and dropping it off at the airport. The oversized baggage belts are sometimes located at the very far end of the airport, sometimes they are not staffed in the early morning hours, or simply not open at all. Sorting out all of this means that you will spend a lot more time at the airport before your flight, so plan that in.
Keep a printout, a screen grab or an e-mail confirming the airline bike carriage policy. Check-in staff may not know the details, even if they argue that they do, be firm but friendly when stating your rights, otherwise, you may end up with the worst seat on the plane.
Be prepared to ditch non-essentials. It’s a good idea to have someone with you who can take these back home if needed. Remember that just because you didn’t get charged going out doesn’t mean it will be the same on the return leg, so travel light.
Some may wear a cycling top and put heavy stuff in their pockets or leave it with a friend outside of the check-in area, and then simply stash it back in the bike bag/box when taking it from the check-in desk to the oversized scanner. A couple of kilograms excess could be the cost of a pair of good tyres saved.
Always check your bike for any transit damage before you leave the baggage claim area and get any relevant paperwork sorted if it is damaged.
In many cases, you will be made to sign a damage waiver on the luggage tag when checking in (which they are unlikely to explain to you), and most airlines only pay a few pounds per kg on damaged or lost items, which is hardly worth chasing. Travel insurance is often the best option here, although most will have limited compensation on offer.
A multi-tool, a tiny container of grease and oil, duct tape, zip ties, a few spare bolts, chain links, a gear hanger, a decent pump and a small 15mm pedal spanner (or Allen key if that’s the only pedal fixing option) are usually sufficient.
If you can get spare tubes or tyres locally with ease do that rather than carrying them.
Avoid taking brand-new bikes as you may have customs issues on arrival. Or at least dirty them up a little.
The bike of choice
What bike should you take with you - do you need your own ride or is it easier just to secure a rental?
These days it’s often easy to find quality rental options in popular cycling destinations. Check options online before you book flights and consider the pros and cons.
You can judge by the response and cycling knowledge as to whether you’re likely to get a decent bike. If you see website images of bikes with kickstands, wonky saddles and handlebars or old models then move on.
Good rental outlets will also be able to give local route advice, and you will not have to deal with maintenance, pay airline fees or have the hassle of carting the bike around.
Unless it’s a competitive event, or you know the conditions well, then the most versatile choice of bike for offroad travel is a hardtail mountain bike, as you can ride on and off-road, it has lower gearing, and you can always take a pair of semi-slick tyres for longer road or gravel rides.
Gravel bikes have somewhat bridged the gap here, but if you want to mix in some epic off-road trails then a hardtail MTB is hard to beat.
You may well have a fancy carbon bike with all kinds of high-tech proprietary kit on it but, should something fail, get left at home or need replacing then it could be a major issue, especially in far-flung destinations. Always try to keep things simple and standardised with your travel bike kit.
Tubeless tyres can be great until you have an issue and need sealant and a good pump. Unless you are heading to a specialist cycling destination or on a tour using inner tubes is a much safer option, and if you anticipate lots of thorns consider sealant-filled inner tubes as a good compromise.


