How to service your shock - tips for both Fox and RockShox

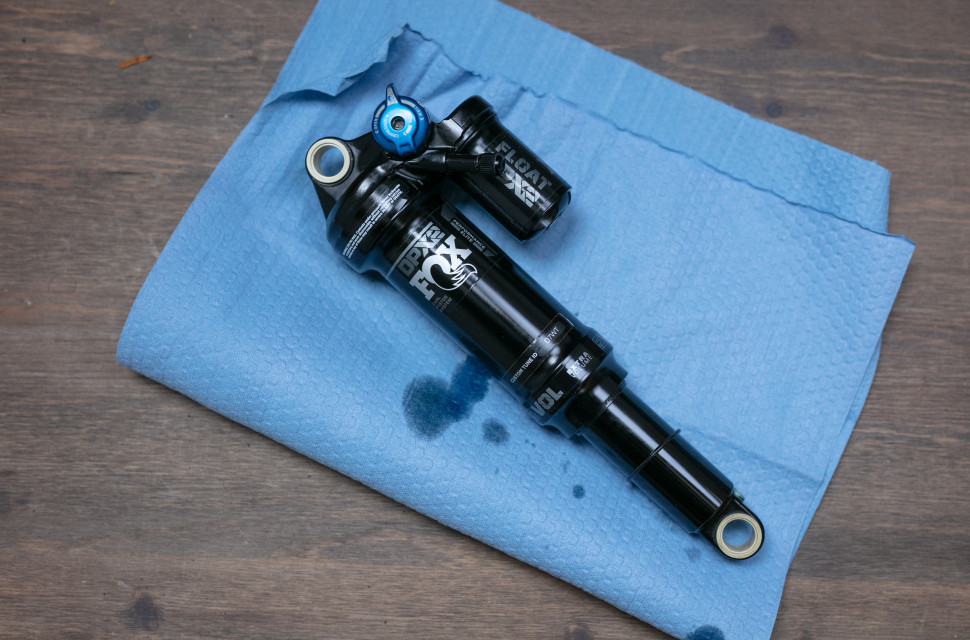
The best mountain bikes, particularly full-suspension options, posses rear shocks that work in tandem with the frame linkages to deliver smooth travel. That said, every suspension platform is only as good as its weakest link, which is why it’s important to keep on top of your shock’s maintenance. Here’s how to do a quick air can service on your rear shock.
- How to set up your mountain bike suspension
- 9 tips to keep your suspension running sweeter for longer
- Busting those suspension myths with Fox
Servicing your shock’s air can is a surprisingly simple task that anyone can do at home and with minimal tools. Neglecting to do this after the recommended 30 hours of riding for Fox shocks and 50 hours for RockShox could lead to increased seal wear, as well as wear on other components inside the shock. As a rule of thumb, it’s best to aim to do this once every six months.
Of course, we’re servicing a shock’s air can here, so this isn’t applicable to coil shocks.
What is an air can service?
Every air shock has an air can, which is the larger portion of the shock. Here, the positive and negative air chambers are found, both of which act as the 'spring' in the shock. As the shock moves through its travel, the air is compressed which pushes back during the shock’s rebound stage (when it extends to full travel).
When servicing an air can, we’ll open up the shock to give it a good clean and inspection to make sure that everything is clean inside. We’ll also replace all grease and oil around this section of the shock.
In this guide, we’ll show you how to perform a quick air can service but this can be taken one step further by replacing the seals. Though, after 30 or 50 hours of riding, it’s unlikely the seals will be in too bad a shape. If there are signs of damage, you may want to consider taking your shock for a full service to be safe. A full seal replacement will be included with a damper service.
It’s important to note that this doesn’t replace a full damper service. Full shock services are still required and should be performed at the proper intervals which is every 100 hours for Fox and RockShox units, assuming that your shock doesn't develop any problems in the interim.
Is servicing a RockShox and Fox shock, or shocks from other brands different?
Yes but only to a point as most air shocks follow a very similar construction. All you’ll need to look out for are other bits inside, such as the countermeasure spring inside RockShox units.
What will be different though is the kind and amount of grease and oils that are required to lubricate the shock. Fox recommends one pillow pack, or 5cc of Float Fluid whereas RockShox asks for a seal grease and air can lube. These requirements will be specific to the brand of your shock.
What do I need?
- The correct lubricants for your shock
- Rag or cloth
- Allen keys for removing shock from the frame
- Pick or small Allen key
- Torque wrench
Useful things to have on hand
- Vice
- Strap wrench
- Gloves
1. Remove your shock from your bike
This job is only made easier if you remove the shock from your bike. When removing the shock from the frame, take your time as there is always the possibility of chipping or knocking the paint.
While you’re here, if the lower mounting hardware is wider than the shock’s shaft, this will need removing too as well as the sag indicating o-ring. Store these in a safe place.
2. Release pressure and unscrew the air can
With your shock prepped and out of the frame it’s imperative that you release all of the pressure. Neglecting to do this will likely result in injury. At the very least, it’ll destroy the threads that secure the air can to the shock.
This can be done with a shock pump to gradually release the pressure and finished by pressing the Schrader valve’s pin using a small pick or Allen key.
Now that your shock is safe to work on, unscrew the air can from the body using the usual righty-tighty, lefty-loosey technique. This may be tough to unscrew initially, so a strap wrench can be handy here or you could use a vice to clamp the upper eyelet of the shock for better purchase.
Once free from the threads simply pull the air can away from the shock’s body. There will be some resistance as a vacuum effect is created in the negative chamber as the internal piston is pulled but don’t worry; just pull through it. You might want to wear a pair of gloves for the balance of the service as it can get a bit messy.
3. Clean everything
With a clean rag, clean off all of the old grease or oil. This is your best chance to fettle with your volume spacers or bottomless tokens and to give your shock a thorough inspection for wear.
Take a close look at the seals and the inner shaft for wear and scoring. Also have a look around the inside of the air can for signs of damage, as well as the external dust wiper seal. If there’s any wear present, that’s a good indicator that now’s a good time to get yourself a seal kit or take the shock to your local mechanic for a rebuild.
4. Relube and rebuild
Following your shock’s manufacturer’s recommendations re-lube your shock, spreading the lubricant evenly throughout. It’s also handy to pop a little bit of grease on the air can’s thread.
Once done, slide the air can back onto the shock. It will be tough to push the can to the threads but if you hold it close, the air pressure will equalise, making it easier to engage the threads. Don’t forget to reinstall your sag o-ring and mounting hardware.
Finally, reintroduce the shock to the frame and fasten everything back together as per the manufacturer's torque settings. Your air shock is ready to ride for another 30 hours.


2 comments
You can if you like but there's no harm in doing it afterwards.
"With your shock prepped and out of the frame it’s imperative that you release all of the pressure."
Shouldn't this be done before removing the shock from the frame?