How to set up your mountain bike suspension - suspension set-up explained
Suspension set-up can seem like a bit of a dark art. With forks and shocks coming festooned with dials and buttons it’s easy to get lost and find yourself unknowingly putting up with a sub-optimal setup. But fret not, as here we’ll explain what each of those knobs do and how best to utilise them to get your suspension working optimally.
- 9 tips to keep your suspension running sweeter for longer
- Busting those suspension myths with Fox
- How to tweak your mountain bike's geometry - Suspension
Mountain bike suspension settings explained
Mountain bike suspension terminology explained
Save for Lauf's Grit gravel fork, all suspension platforms have three main adjustment points: sag, rebound and compression. Each of these do different things but understanding their application is essential in achieving the best suspension set up for your riding.
Before getting into the details, we advise visiting your suspension brand’s website to establish the quickest and easiest suspension set up. There, you’ll find a set up guide where you’ll pop in your details and it’ll fire out some generic recommended settings. Often, recommended settings are also printed onto the back of your fork. These will give you solid baseline values for your bike and weight, though it shouldn’t be relied upon as it may not be perfect for your riding style or preferences. That's where some good suspension know-how is more than handy.
Everything you read here is only intended as a guide. Suspension set up is very much down to personal tastes so we encourage you to experiment - so without further ado, here’s what the adjustments do.
Sag
First off, we’ll go right back to basics and have a look at your suspension’s sag. Sag is how deep your suspension sits in its travel when weighted. When riding, this allows the suspension to extend when necessary to keep your wheels glued to the ground. On air sprung suspension, it’s adjustable using a shock pump, which is designed especially to reach high pressures.
Generally, you should aim to have your sag reaching 15-20% of your fork’s travel and 25-35% of your shock’s travel, as measured by rubber o-rings. That said, the brand of your bike may recommend something slightly different, so that’s worth checking beforehand.
There’s a bit of a range to play with, so when setting your sag, feel free to experiment. Putting more air pressure into your suspension to reach around 15% sag on your fork will make it feel firmer and pumping less pressure to reach 20% will make it softer and easier to use full travel.
The idea is to find a balance where you’re not bottoming out your suspension often but you are using full travel in the necessary situations. Some people like to over-sag their suspension so it rarely uses full travel, leaving a little left for those emergency situations. Over sagging the fork especially will help it stay propped up and supported when tackling steep chutes, too.
With coil suspension, adjustment isn’t quite as simple as sag is solely dictated by the weight of the spring you’ve installed. Most suspension brands have spring weight calculators on their websites, so before taking the plunge and buying a spring-type suspension shock on guesswork alone, be sure to consult the websites. Note - applying loads of preload onto a coil won’t help achieve proper sag.
Now, let's unpack and dig into those knobs.
Rebound
Your rebound adjustments control the rate at which the suspension returns to its full travel after it’s been compressed. On lower end forks you’ll find just a low-speed rebound adjustment but when we get to Fox Factory or RockShox Ultimate level, high-speed rebound creeps into the picture.
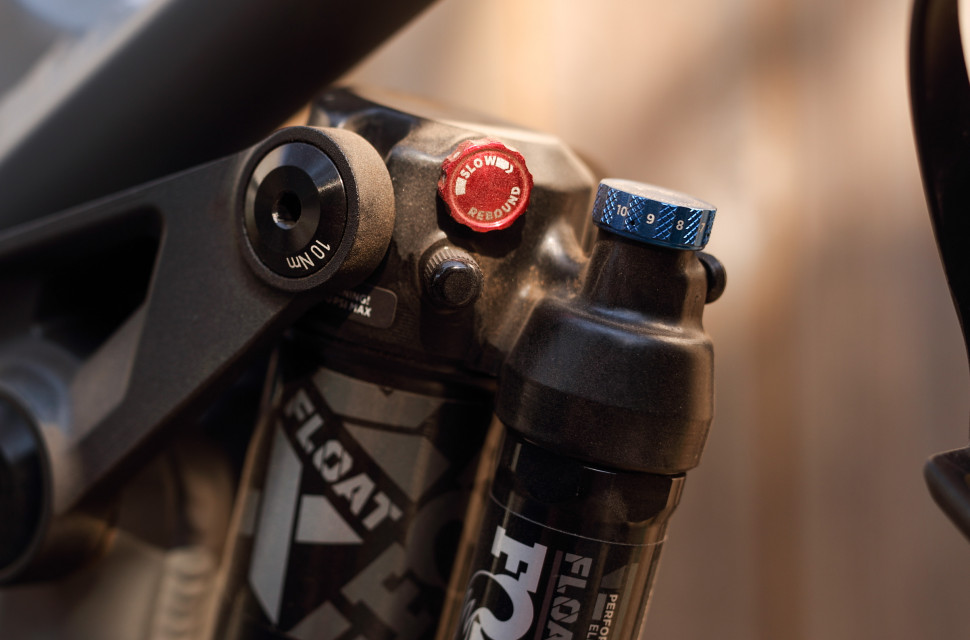
Low-speed rebound is what’s found as an external adjustment on nearly all suspension on the market. It’s the little, often red, knob at the bottom of the right fork leg and at the base of a shock’s air can. Low-speed rebound deals with everything within the first two thirds of travel, so that’s berms, pumped compressions and trail chatter.
Setting your low-speed rebound is very much a balancing act. Set it too slow or twisted towards the + or tortoise symbol and it’ll ‘pack down’. That’s when the suspension can’t rebound fast enough to offer up enough travel to soak up the next bump. You’ll know that your suspension is packing down because it’ll feel very harsh and your bike will sit deep into its suspension and you're rolling into bumpy sections.
Too little low-speed rebound damping can feel similar, so this is where it might get confusing. However, the bike will feel lively, springy, and uncontrolled - and can even result in arm pump. Adding low-speed rebound calms down this effect, boosting overall control and comfort.
High-speed rebound deals with the final third of travel as that’s where the spring will be under the most pressure, where it wants to push back harder or faster. Adding more high-speed rebound damping will slow down this effect and is most applicable through big compressions, so jumps and travel-sucking hits. Winding on more high-speed rebound will slow the rate of rebound in these situations. This setting is found on higher end suspension, such as Fox’s Performance Elite to Factory range and RockShox’ Ultimate line-up.
Compression
Compression damping is the absolute opposite to rebound. This controls the speed of which the suspension compresses during impact. Much like rebound circuits; compression can come with low and high-speed adjustments with the latter mostly reserved for spendier units.
Low-speed compression is noticeable when under general trail riding conditions, when riding over mild trail undulations and when pedal bob influences the suspension. As a rule of thumb, it’s when the suspension is compressing slowly. Winding more on will firm up the suspension in these areas, helping it resist wallowing and pedal bob. Too much compression will restrict the suspension’s freedom to compress, which will feel harsh. Too little makes the bike feel sluggish while pedaling and it sacrifices overall feedback, however, your bike will feel plush as it's free to soak up bumps easily.
High-speed compression applies to bigger hits such as when you’re landing a jump or drop, or riding through hard, square-edged hits. This setting is useful for those who ride more aggressively as it’ll help the suspension resist diving and sending weight forward when hitting tech at speed, for example.
In general, more compression damping calms the shock down and makes the bike sit up higher in its travel and more efficient. However, that comes at a sacrifice to small-bump sensitivity. It can make a bike more sensitive as it feeds bumps back harsher. Too much compression can also reduce grip as the suspension isn't as free to compress.
Bottomless tokens or volume spacers
These are little chunks of plastic that sit inside of your suspension’s air chamber and, as such, are only compatible with air suspension. The point behind these is to increase the suspension’s rate of progression by decreasing the air chamber’s overall volume.
Air is progressive in nature, which means that it firms more and more up as it’s compressed. Volume spacers adjust how soon the suspension firms up in its travel.
Volume spacers are great If you find that you are bottoming out too often while setup with proper sag or if you want a more active and poppier characteristic from your suspension. Because they increase progression, your suspension will be better propped up when weighted, too.
To install volume spacers, you’ll have to remove the top cap of the air chamber or unscrew the air can on your shock (after removing all air pressure). They then clip or screw onto the top cap, or clip around the shaft inside of your air shock. Volume spacers are brand specific, so RockShox' Bottomless Tokens won't fit inside a Fox fork, for example.
As mentioned before, volume spacers can only work on air suspension and both shocks and forks can only accommodate so many. There’s no set rule for how many you should use so definitely experiment here to find what works best for you and your bike.
Preload
Preload is an adjustment only found on coil suspension and it does as its name suggests, put load onto the spring. This can have some bearing on the suspension's sag but shouldn't be used as an adjustment to reach proper sag as winding on too much preload can cause the spring to bind, harshly restricting the amount of travel on offer.
Preload is a form of compression damping that can be used to counteract pedal bob. When setting your preload, you shouldn't wind the collar any more than four turns before the coil could begins to bind.
How to set up your mountain bike suspension
1. Reach proper sag
First off, you'll need to set up your sag. Sag is the most important setting as, without proper sag, you'll never achieve a good setup.
To do so, you'll need to find your target sag measurement of the shock's or fork's stroke. If you're looking to hit 30% sag on a shock with a 60mm stroke length, for example, that'll be 18mm (Google is pretty good at percentages). You now know that you'll need to inflate your shock so there's 18mm between the wiper seal and o-ring to achieve 30% sag.
Fully kitted out with your usual riding kit and amount of water, hop on your bike then gently get off so as to not move the shock. Then measure the distance between the wiper seal and o-ring. If it's more than 18mm, you'll need to add more pressure. If it's less, take some away. This is the same with the fork, just get off the bike towards the rear as to not move the fork to get an accurate sag reading. The rebound and compression dials should be fully open and the suspension should not be locked out.
Top tip - With coil shocks, you can use the bottom out bumper as a sag indicator
With both air forks and shocks, remember to compress them a few times as you're inflating. This will charge the negative air chamber. If you forget to do so, you'll head out on a ride thinking you're at correct sag, only for it to be thrown out of whack once you hit a bump, and the negative chamber charges balances, reducing the overall psi.
2. Dial in your rebound and compression
Now that you've got a good baseline sag and know what the adjustments do, it’s time to head out to the trail. Preferably, this will be a trail that you know very well and is representative of your everyday riding. It’s also useful for it to be easily accessible from the bottom as you’ll repeat this trail a number of times.
Before going anywhere, make sure you’ve got a notepad or your phone so you can jot down your base setting and any changes you make. Not only does this stop you from getting lost within those dials and clicks but it’ll also come in handy when receiving your fork or shock back from a service, where you’ll bypass this whole process and be able to whack in your settings before introducing your fresh suspension to the trail.
When you’re at your favourite trail, it’s best to start dialing in your rebound. Firstly, wind the dial so that all adjustments are completely open (turned towards the hare/rabbit or - symbol) and with each run, add rebound damping (turn the dial to the tortoise or plus symbol) click by click while noting how many clicks you’ve added. As you add clicks your suspension should feel smoother, easier to handle, and that it’s tracking the ground better until it begins to feel harsh, where it’s packing up. There, you’ll know you’ve added too much rebound damping and then, all you’ll need to do is turn the dial towards the minus or hare/rabbit back to where the suspension felt the best.
This process is exactly the same when setting up compression too. The goal is to create a setup where both wheels are tracking the ground while the suspension is feeling relatively smooth and supportive without becoming harsh. It's also good to arrange your setup so the front and rear suspension so it feels similar and balanced.
While dialing in these settings, keep an eye on that o-ring you used to measure your sag. If you find you’re bottoming out too often, add a few PSI and if it's sitting in the middle of the stanchion even after the biggest of hits, you'll need to deflate your suspension to suit. Once you've struck a balance of all of these settings that works for you, there you go! That's your suspension setup.
Mountain bike suspension set-up suggestions
Unfortunately, there is no one suspension set-up to rule them all, so if you’re regularly riding varying terrain, some tweaks will be required to suit those particular conditions. For example, if you’re riding loads of big rock gardens very quickly, you may want to speed up your rebound by a click or two and add some compression to keep your wheels tracking nicely and to keep your suspension from diving on the bigger hits.
If you’re spending a day riding jumps you might want to consider slowing down your rebound, to stop your bike from bucking you and tipping your weight forwards as you take off. You should also think about firming up your compression so the suspension doesn’t dive and wallow as you’re moving up a takeoff. It's a good idea to add a few psi to further firm your suspension, too.
When riding through very muddy conditions, adding some rebound damping will boost control and help your wheels track the ground more effectively as, generally, you won't be riding as quickly.
If you ride a lot of steep trails, you'll likely be hanging more of your weight towards the back of the bike, leaving the front unweighted. Running your compression so it's less damped will help claw back much-needed traction.
As there is an awful lot to think about when setting up suspension, a very useful exercise is to do a couple of runs with all of a particular adjustment wound on, and then with all of that same adjustment wound off. This will teach you how it feels when you're running with too much or too little of an adjustment, which can save you from an awfully large headache when something about your suspension doesn't feel right but you can't put your finger on exactly what that is because you'll know what it is by feel.


