How to tweak your mountain bike's geometry - Suspension
4 handy tips to adjust your bike's geometry through its suspension

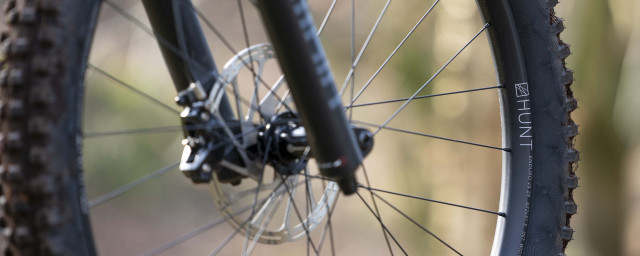
As a mountain bike rattles down a decent, the suspension works away to absorb pumps, boosting grip and resulting in a comfy ride. However, it’s very easy to ignore the fact that actually, your geometry is constantly morphing as it traverses lumpy terrain. Thankfully, there are a handful of sneaky tricks to adjust your geometry through its suspension, even if it doesn't look like it's been fettled with at face value.
- Your complete guide to the RockShox fork range
- The best (and worst) mountain bike upgrades under £100
-
11 mountain bike things you think you need... But probably don't
What you need to know
As previously mentioned, if your mountain bike has suspension, its geometry will be in a constant state of change as the squishy bits get to work. A great example of how your bike's geometry changes as you ride lies pleasantly within the humble hardtail. Because it doesn’t have rear suspension, it pivots far differently to a full susser as the fork is the only part that compresses. That means, that during compression, the head angle will steepen pretty drastically and the bottom bracket will dip. This effect will be much more noticeable on hardtails with a lot of travel but it's a characteristic found on all hardtails.
Now we’ve got how a bike's geometry moves as it’s being ridden (the dynamic geometry) out of the way, it’s worth saying that, like every form of geometry adjustment, not all of these methods will be compatible with your bike. Though many of them are totally fine, free, and up for some experimentation so I’ll be sure to highlight the ones that need extra attention before installing when we get there.
We've also got tips on how to adjust your geometry through your bike's frame and cockpit.
Achieve a proper setup

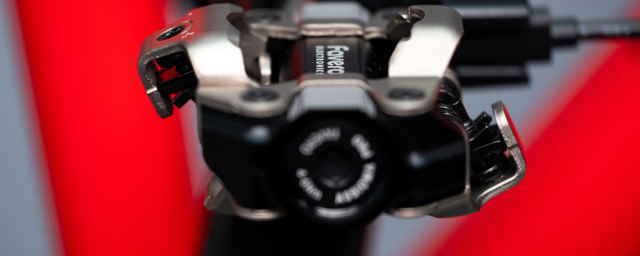
First and foremost, there's no use diving into your bike’s suspension without a solid setup. It goes without saying that poorly setup bouncers can totally ruin a bike's ride characteristic, affecting your confidence and your overall opinion of the bike. I’ve even come across people riding on range-topping Fox Factory suspension, claiming that it’s destined for the bin, without realizing that actually, it’s just poorly set up.
The best place to start is with correct sag and with the rebound dials bang in the middle of their range. Then you can add, or take away clicks depending on how the bike feels to you. Better yet, session a trail you know well and have a play. That’ll give you the best idea of what the settings do, and what feels best. Once you’ve got your setup dialed, then look at what you can do to tweak your geometry.
Play with your sag, rebound damping, and compression damping.

Now our suspension is properly set up, it's time to get experimenting. Something that’s often overlooked by the average rider is that there’s a recommended sag range that can be taken advantage of to change how your bike rides and sits in its travel. For a fork, that’s around 15-20% and shocks, 25-35%, firming either end up will affect how your bike rides in a range of situations.
For example, if you’re riding a lot of steep stuff, you might want to pump a little more air into the fork, and take some out of the shock while bumping up its rebound a touch. This will keep the front end of your bike better propped up and achieve an effect much like slackening your head angle while the faster rebound holds the shock at a good place in its travel, without allowing it to bottom out too easily.
If you find your weight hanging over the rear end a little too much, firming up the shock will help it sit higher in its travel, and shift weight forwards.
Rebound damping is where a range of issues can occur. If it’s too slow, that’ll encourage the bike to sit lower in its travel and pack down over repeated hits. This will make your bike feel noticeably harsh the suspension can’t rebound quick enough to absorb the next hit. Upping the rebound to a more suitable speed will get your suspension working better, and sitting at a higher place in its travel over the bumpy stuff. In turn, this will make your ride smoother but be careful not to overdo it, as that'll result in a springy feel.
A similar effect can be achieved by adding low-speed compression damping. An extra click or two will prop the suspension up a little but at the expense of small bump sensitivity.
Add travel to your fork

Adding travel to your fork is a go-to for many riders because not only does it change your geometry but you’ll also reap the rewards that a bit more travel offers. As a rule of thumb, an extra 20mm of travel will equal 1° of angle adjustment and 10mm of growth in its front centre. Although, a boost in travel will raise your bottom bracket and slacken your seat tube angle too.
This also comes with a couple of caveats. Firstly, it often requires an air cartridge change or some fettling with the gubbins inside of your fork, which is something that’s better left to a professional bike wrencher. However, you’ll also get a full fork service while they’re at it but that will be factored into the price. That might be something you’ll want to leave until you’ve reached the time for your annual service.
Secondly, your frame is designed to run within a certain travel range, exceeding that at least voids your frame’s warranty. At worst, your frame will fail.
Aftermarket linkages

Starting off with aftermarket linkages, some brands such as Cascade Components offer linkages for specific bikes that'll bump up the travel and alter the bike's leverage curve. For example, Cascade Components offers a link that'll up a Santa Cruz Hightower's travel, adds mid-stroke support and alters the geometry a touch. This particular link can be run with a slightly longer stroke shock that’ll offer more travel and let the bike sit slacker thanks to a deeper sag point.
Of course, this product is only compatible with the Santa Cruz Hightower but Cascade Components stock alternative linkages for a range of bikes. Bike Yoke is another brand to look at, offering links that allow for standard shocks to be used in Specialized frames and links that make it possible for Canyon's Strive to be run without the ShapeShifter. Do some research and you might find a link that works for your bike.
Different shock sizes

Then, bikes can be kitted with shocks with a shorter eye-to-eye with the same stroke length, which will achieve a very similar result as a set of offset bushings. It’ll encourage your bike to sit lower while slackening your head and seat tube angles.
It’s also possible that you could fit a shock with the same eye-to-eye length but with a longer stroke, effectively boosting your rear travel and deepening your sag point. However, here, you’ll need to check for any frame clearance issues as you might find that the rear tyre will now buzz your saddle or seat tube. Even worse, your seat stay bridge (if you have one) could knock against your seat tube as the bike reaches the latter stages of its travel.
Of course, buying a whole new shock for experiment's sake isn't a cheap endeavor.
You might also like:
Author block