Disc brake pads explained: Organic vs sintered vs semi metallic
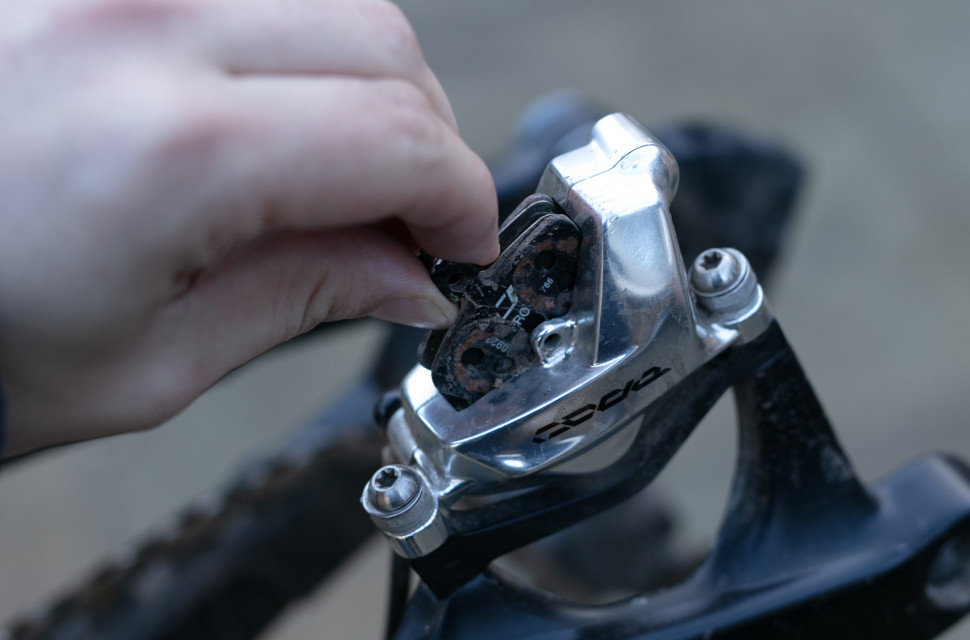
Brake pads are one of the most important components of the mountain bike brake system. They're responsible for providing the friction to the brake rotor that slows you down. But, as with many things in cycling, there's a range of brands and pad compounds to consider – all of which provide advantages and disadvantages in different conditions.
- How to set up your mountain bike suspension
- How to start mountain biking
- How to bleed SRAM, Hayes and Magura brakes
While there are several different pad compounds on the market (and some brands call them different things), there are two that are commonplace, sintered (or metallic) and organic (or resin). There are other compounds around such as semi-metallic pads that are designed to blend the performance of sintered and organic pads, as well as e-bike-specific longer-lasting compounds. Some brands also offer even more powerful race-specific compounds but we'll be focussing on the main trio: organic, sintered and semi-organic.
Organic (Resin) brake pads
While formulas can change marginally, organic brake pads are built of a mix of kevlar and other materials such as silica that are bound using a resin, hence the name 'resin' brake pads.
Often preferred by cross-country mountain bikers and roadies, organic pads provide a sharper braking response and they'll bed in faster than other compounds. Organic or resin brake pads offer quieter braking and they don't require as much temperature to work at their best. They're also better at keeping heat within the pad and rotor, away from the brake fluid and caliper itself.
Organic brake pads aren't without their downsides, however, the power they provide can fade at higher temperatures. Especially if the temps exceed a certain limit, they can glaze, which reduces braking power greatly. They also wear faster than their sintered counterparts and the performance takes a hit when riding in the wet. As such they're a great choice for those who mostly ride in dry weather.
Sintered (metallic) brake pads
Sintered brake pads are chosen mostly by riders of a gravity persuasion but also those who want more effective braking in wet conditions, so they make a fine choice for the bulk of the UK's riding. These pads are made by pressing metal particles together.
Although sintered brake pads require a higher temperature to work best, they're more durable and perform better in wet and dirty conditions. Unlike organic pads, metallic variants shouldn't glaze and they'll cope better at higher temperatures.
However, the pad material doesn't insulate as effectively, so the temperature can be transferred to the brake fluid. Sintered brake pads are usually noisier and they take longer to bed in.
Semi-metallic brake pads
Semi-metallic brake pads provide a middle ground between organic and sintered, being constructed of a compound that's not too dissimilar from an all-out organic pad but it includes bits of metal.
The result is a brake pad that performs better in wet conditions and with greater durability. They don't take quite a long to warm up, either but such performance comes at a premium price and like organic pads, they can glaze.
When and how to replace brake pads
Swapping brake pads is one of the simplest jobs you can do on your bike but it's incredibly important to check your brake pads before you ride, especially before a big day riding, or time at the bike park. That's because brake pads wear and if you're not keeping tabs, worn brake pads mean next to no braking power. Riding with worn brake pads can also damage your brake rotors.
Best done before each ride, if not every other ride, all you need to do to check the health of your brake pads is to look down through the caliper. If the material is wearing so the surface matches or is close to the retaining spring's height, you'll need to replace those pads.
To replace your brake pads, you'll need to remove the corresponding wheel. There's then either a bendable pin or a bolt with a retaining clip holding the pads in place. Using a pair of pliers, the pin can be bent straight to then be pulled out. If you've got a bolt and a retaining clip, simply pull the clip away from the bolt and unscrew the bolt using the correct Allen key. Then the pads are free to be removed.
With a plastic tyre lever or similar, push the pistons back into the caliper. This is also a good time to give those pistons a clean and lube if you want to give your brakes a bit of extra TLC. All you need to do from here is pop your fresh pads into the caliper and replace any bolts and retaining clips but do so with clean hands or while wearing clean gloves to keep any oils well away from the braking surfaces.
How to bed in brake pads
All brake pads require a bed-in period before they achieve the best braking performance. This process relies on repeated heat cycles that transfer the brake pad material to the rotor, making the pair mesh better and then providing optimal friction.
However, this is best done in a controlled, dry, and clean environment for the best results. Doing so should increase pad life, and reduce uneven wear and the potential for a pad to glaze. Bedding in brake pads when out on the trail can introduce dust and dirt to the braking surfaces during this process which will stop them from meshing perfectly, reducing overall performance in the long run.
To bed in your brake pads, find a gradual decline, jump on the bike, and roll down. With a bit of speed gathered, pull the brakes while smoothly increasing the power until the bike slows, but doesn't stop. Rinse and repeat around 20 times for the best results. Avoid doing this on a busy road too.
How do I know what brake pads I need for my bike?
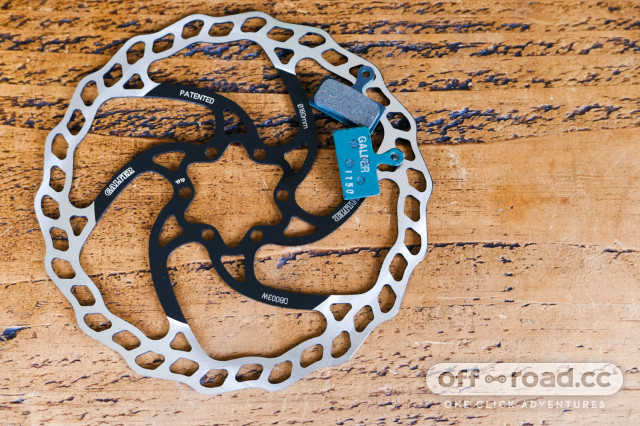
Brake pads are not a one-size-fits-all product as many brake models use pads of a different shape. Before buying a fresh set of pads, find out what model of brake you've got by looking at the brake itself for serial numbers and model names. Then buy the corresponding pad for that specific brake.
Commonly, one brand will use the same brake pads for its range of brakes but it's always wise to double-check compatibility before dropping the cash.
Do I need finned brake pads?
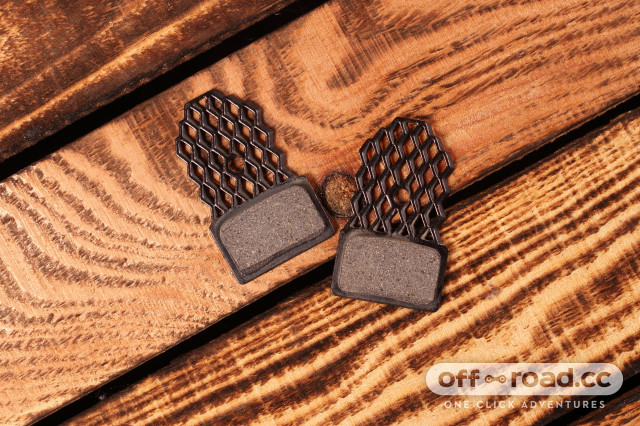
Brake pads with cooling fins were introduced by Shimano in 2015. Dubbed Ice-Tech, these fins were built onto a pad's backing plate to help cool the brake pad, thus improving its performance and braking consistency by utilising airflow to dissipate heat. Cooling fins, now, aren't only found on Shimano's brake pads with other brands jumping on the bandwagon.
However, as brakes rely on heat to work at their very best, the efficacy of finned brake pads is arguable. Plus, finned brake pads are more expensive than their non-finned counterparts.






3 comments
You're quite right that isopropyl alcohol is the right stuff to be using, but having a bit of aerosol power behind it is a boon if you're a bit lazy..
Good shout on the tyre levers too!
"claimed to give improved performance as the heat generated under braking"
Well, they do work, and I learned that in practice! My ingenius LBS, replaced my road bike's ice-tech pads, with standard ones and I didn't notice. After suffering several rides with horrible brake fading, the pads and the metal spring between them melted and became one piece. Also the calibers look like burnt and their paint chipped off. I am lucky I didn't get any frame damage (i hope!).
Ever since this incident, I trust my bike to no LBS, and I got ice-tech pads for all my MTBs too!
Highly recommended cheap upgrade
"clean the calliper with disc brake cleaner"
Hayes say "Clean the disc and the hub-mounting surface with isopropyl alcohol (not disc brake cleaners)." I think it's because disk brake cleaners can have additives in. Just stick with isopropyl alcohol, it's the major constituent of disk brake cleaners anyway, and probably a lot cheaper.
Also plastic tyre levers are really good for levering pistons, particularly phenolic ones which can chip easily with a sharp thing like a screwdriver.