Essential mountain bike skills for beginners
New to mountain biking? Here are the basic skills for safe and controlled riding.

Riding over a mostly unpredictable and inconsistent dirt surface throws a huge array of challenges, even to those who have been doing it for years. But fret not, it’s all a learning experience and there’s a fountain of mountain bike skills that can be tapped into to make you a confident and better rider.
- 10 pieces of essential mountain bike clothing for beginners
- Mountain bike fitness - how to improve your MTB performance
- 7 trailside fixes every cyclist should know
To get the most out of your mountain biking and help you gain confidence, there is a collection of basic skills that you need to master. You'll need to take things slow because mountain biking is as mentally challenging as it is physically. It's worth only working on one or two skills at a time to ensure you master them before adding more to your skills repertoire.
It’s important to remember that mountain biking, especially in your early days, isn’t all about going fast as this can develop bad habits, and get you hurt or injured. It’s all about learning to walk before you can run.
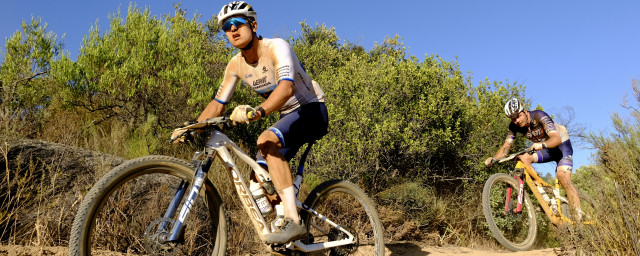
Look up, look ahead
Keeping your eyes up may not be considered a skill in the grand scheme of things but looking up and ahead is vital to your riding success. It’ll allow you to scan the trail ahead, and spot obstacles and corners well before they reach your front wheel, which will give you plenty of time to prepare for or avoid what’s coming.

2023 canyon neuron on cf 8 pan.jpg, by Liam Mercer
When the trail is intimidating and obstacles are coming thick and fast, it’s all too easy to focus just ahead of your front wheel. While perhaps comfortable in the early stages of your MTB journey, doing so will be detrimental to your riding career, after all, if a feature is already at your front wheel, it’s already too late.
That goes for corners, too. Just because the trail doesn’t stretch out straight in front of you doesn’t mean that there’s not more to prepare for just ahead. Remember to look through the corner, keeping your line of sight ahead – where you look is where you go.
Sometimes, even experienced riders, can get overwhelmed by a surprise amount of speed as they roll into a technical section. Instead of dropping the anchor, looking up will help you pick the correct line and roll through with less chance of a serious issue.
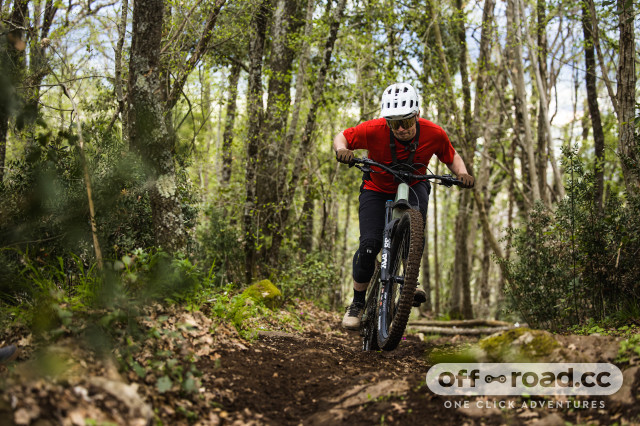
Learn to master the attack position
When it comes to descending, there’s one thing you don’t want to be doing – sitting. Doing so will only end badly as your bike will buck you and throw your weight balance all over the place, which will lead to a fall or going over the bars in some situations.

YT Industries Jeffsy riding 7.jpg, by Liam Mercer
Because of this, there’s a single standard position to adopt – the attack position. Standing on the pedals with your arms and knees slightly bent is the best place to be and will prepare you to tackle bumpy terrain when descending. Having your joints pre-bent allows them to act almost like body suspension, ready to absorb bumps as your bike's tyres roll over them.
But remember to stay loose. Riding with a stiff posture over the bike will have a very similar effect to sitting on your saddle. It’ll force your weight all over the place. When descending, keep your head level, while your arms and legs ensure the bike moves around underneath you.
Understanding weight distribution
The basis of all mountain bike skills is weight distribution. How you distribute your weight over both axles affects how well your tyres grip the ground, or the opposite, depending on what result you’re trying to achieve. But importantly, when climbing and riding downhill, you want your weight to be evenly distributed over each wheel. Doing so can look different depending on the gradient you’re riding on.
2023 canyon striveON cfr riding climb 2.jpg, by Liam Mercer
Weight distribution is a surprisingly deep subject with tonnes of nuances but, for now, a good way to think about it is to picture where your hips are when you’re standing over the bike. Moving your hips rearward and over the back of the saddle will place weight towards the rear of the bike, whereas moving your hips forward will weight the front. Lowering your chest will also do this, especially when climbing in a seated position.

2022 yt capra core 2 riding 4.jpg, by Liam Mercer
How you need to distribute your weight depends on what’s going on in the trail and it’s something that’s always in motion. If you’re climbing and your front wheel is lifting, drop your chest closer to the bar, and shift forward on the saddle. If you’re rolling over a big downward step, putting your weight backward and behind the saddle will keep you from flinging yourself over the handlebar.
A great way of learning the limits of how you can distribute your weight over the bike is to ride slowly over flat ground (a fire road, park, your garden) and lean as far forward as you can, and as far back until your bum hits the rear wheel. All of this, apart from the very limits, is usable space you can put yourself in when negotiating uneven terrain.
The benefit of a neutral attack position
Despite what many people and internet guides recommend, keeping your weight back when descending is a terrible idea. As mentioned before, certain circumstances do require moving over the back of the bike but this should not be a standard stance, even when the terrain gets steep.
A rearward-centric position isn’t a good idea for a plethora of reasons. First off, it’ll limit how effectively the front of your bike will perform, that being your suspension fork and front tyre. Without proper weight pushing the tyre into the ground and helping the suspension work at its best, it’ll suffer from reduced grip and the front of the bike will be difficult to control. It also means that your weight simply isn’t in the correct position to deal with most of what a trail can throw at you.

YT Industries Jeffsy riding 8.jpg, by Liam Mercer
Keeping your weight over the rear of the bike will almost completely straighten your arms, too. Then those straight arms will have an incredibly limited ability to move and absorb bumps as the bike moves underneath you.
Lastly, if your weight is already rearward, you won’t be able to move any further back when the time calls for it, making tackling most trail features more difficult than it should be. A neutral attack position is the best position to adopt as it’ll give you the flexibility and option to move weight around freely while dealing with bumps as you ride.
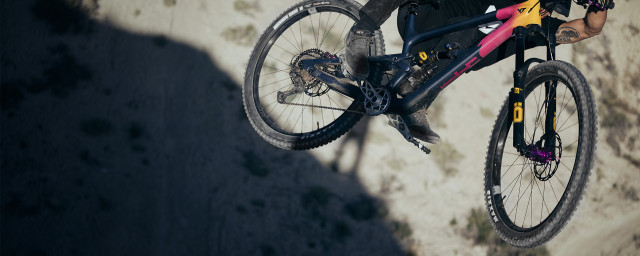
Lifting the front wheel
Whether it’s a wheelie or a manual, being able to confidently lift your front wheel opens up a range of riding opportunities by allowing you to get over roots and obstacles without the worry of your front wheel hanging up, which will reduce your momentum or even send you over the bars. It’ll also help you ride smoother and faster up and downhill.
However, you don’t necessarily need to employ a wheelie or a manual to get the front wheel off of the ground, all it takes is a relatively small movement of the top half of your body. Keeping your lower half in the attack position, bend your elbows and lower your chest to the handlebar. Then push on the bar with some force while straightening your arms. Once your arms are straight, the front wheel will lift off of the ground. This can be performed in both the attack position and when seated.

2022 yt capra core 2 riding 2.jpg, by Liam Mercer
Now, this isn’t the best technique to turn to every time you need to get the wheel off the ground and over something but it’ll help get the front wheel over things when climbing and it’s a good starting point when getting to grips with weight distribution and how it can manipulate the bike.
From here, you can put in a sharp pedal stroke to get the front wheel up even higher and wheelie as the lowering of your chest and explosive straightening of the arms is one-half of the trick. But remember to keep a finger on the rear brake for when the wheel gets too high – a quick squeeze will force the weight balance forward and drop the front wheel quickly.
Appropriate gear choice
Your gear selection is vital to any forward momentum you gather and the difficulty of building it. Pushing the large paddle on your shifter will move the chain into a larger gear and make pedalling easier, allowing you to increase your cadence (speed of pedalling rotations) while pushing the smaller paddle will move the change into a smaller gear and make it harder to pedal and slow your cadence. Of course, this all changes when it comes to how fast you're riding. The faster you're travelling, the harder or smaller a gear you want to push to go even faster or maintain momentum after technical features. Easier or larger gears make for an easier time when climbing and during slow-speed efforts.

Forest of Dean Trail Guide-106.jpg, by Liam Mercer
However, being in the correct gear for the terrain or scenario you're about to ride through is as important as your current gear selection itself. Even though pedalling in a comfortable gear is excellent for balancing forward momentum with energy conservation pre-shifting into a gear for the climb, descent or even corner you're about to tackle will help maintain that all-important momentum and conserve even more energy.
For example, if you're about to negotiate an uphill switchback, shift into an easier gear ahead of time rather than mid-corner. Not only will this make the effort much easier, but it'll save your derailleur and cassette from crunching and keep pedalling smoothly.
Cornering
Cornering a mountain bike is a completely different ball game from cornering a road motorcycle or even a road bicycle. Again, it’s all about proper weight distribution but it’s also about working harmoniously with your tyre tread.

2022 YT CAPRA Core 4 Riding 2.jpg, by Liam Mercer
Instead of leaning with the bike, as you’ll see roadies and motorcycle riders doing, to gain the most traction available, keep your body weight over the bike as it leans underneath you. To do so, drop the outside pedal (if you’re turning right, the left pedal goes down), and bend the outside elbow while straightening the inside arm.
Do this while keeping body weight low and even over both of the wheels.
Even though this will achieve much better grip in flat corners, another notable benefit of this proper cornering technique is that it’ll allow you to compensate for any lack of grip. If you’re leaning with the bike and the rear wheel slips, there’s no opportunity to save it, as your body is in the wrong place to do so.

YT Industries Jeffsy riding 2.jpg, by Liam Mercer
Cornering technique is a fluidic skill as there are some situations such as flat corners that require leaning the bike underneath you and others where leaning with the bike helps, those being berms. Berms are specially cut banks that you’ll see on the outside of the corner. The point of these is to offer support and an appropriate surface to get around a corner without losing momentum. Learning how to to ride berms is a handy skill as it will help you carry speed on the trail.
Often, it’s preferable to hold an attack position when riding around a berm which will allow you to pump the berm and gain some free speed. It’ll also help you resist the compression forces as you navigate the corner. However, choosing which technique to use per corner is a learning process in itself. Find a corner, get familiar with it and experiment.
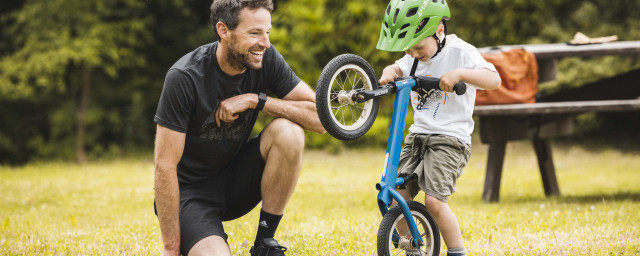
Pedalling in circles
At the very start of your riding career, long efforts pedalling can be quite the battle as your legs begin to develop and condition to arduous climbs and traverses. Many riders will start riding with the best MTB flat pedals, and rightfully so, but there’s one key downside for a new rider and that’s that they encourage the rider to only push down on the pedals.
However, there’s much more to the pedal stroke (rotation of the pedals) than what meets the eye, and extra power or forward momentum, can be eked out through proper pedalling technique.

2023 Canyon TorqueON CF 9 riding climbing 2.jpg, by Liam Mercer
A technique that’s usually chased by roadies is pedalling in a perfect circle, where they’re able to achieve even power delivery by pushing and pulling on the pedals. While road riders use clipless pedals, and a new mountain biker will likely be riding flats, you’ll never get a perfect pedalling circle but some tricks will help squeeze out more efficiency from your pedal stroke. In a mountain bike context, this will also result in more grip when climbing.
Instead of visualising a pedal stroke as only a downward movement, think of it as a downstroke and then pull back on the pedal as it reaches the lowest part of its stroke. Then as the pedal starts to come up, you can scoop the pedal with your foot slightly. Employ this mindset with both legs and your pedal stroke will become much more even as you achieve more power.
Some riders may move to clipless pedals later in their career and then you can work on pulling up on the pedals and achieve a more complete pedalling circle.
You might also like:
Author block