Ways to protect your bike for winter
Ceramic coatings and caring for your bike in winter.

More Features

Everything you need to know about fixing a chain trailside.

Everything you need to know about cleaning your mountain bike disc brakes.

Everything you need to know about pivot bearings and how to replace them.

Top tips for keeping on top go your tubeless tyre sealant.
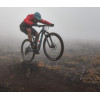
Taking months off from riding during the shorter, cold winter days can trigger singletrack withdrawal symptoms. Advanced riding gear, with fantastic new fabrics, makes mid-winter riding much more comfortable and enabling than a decade or two ago. But even if you are kitted with the best winter riding gear, what about the abuse your mountain or gravel bike is taking, rolling those winter riding mileages across muddy jeep and singletrack routes?
- Welcome to Home Mechanics' Week - a DIY extravaganza
- How to clean your mountain bike
- How to bleed your MTB brakes
Even novice mountain bikers and gravel riders know that disciplined post-ride drivetrain cleaning enhances cassette, chain, and chainring life. But what else should you do beyond wiping, drying, and lubing your drivetrain, to protect your bike from the harshness of winter riding?
Ceramic coatings and hydrophobics
Isn’t it amazing how tiny water droplets roll down the optic surface of your riding glasses when riding? It’s the hydrophobic coating that makes that happen. You can apply the same principle to your mountain or gravel bike frame, reducing mud and grit clinging to the frame.
Very few frame coatings are formulated for off-road cycling, and they are marketed as ceramic coatings, which achieve a hydrophobic effect when applied. These coatings feature a chemistry that effectively fills your frame's micro-surface gaps, making it impossible for mud to stick. Here's how to apply a ceramic coating.
1. Prepare your bike
For the ceramic coating to set correctly and create that hydrophobic effect, you need a bike that has been properly cleaned. Wash your frame and, crucially, let it dry thoroughly.

2024 emtb frame cleaning.jpg, by Liam Mercer
If grit is still attached to the frame or moisture hasn't dried off properly, the ceramic coating won’t achieve a fully functional hydrophobic application.
For a seriously thorough application, consider disassembling some parts of your bike – remove the wheels and the crankset.
2. Clean again with an isopropyl alcohol
Most ceramic coating kits come with an isopropyl alcohol spray. Applying this to your frame with a perfectly clean rag will rid it of any oils or contaminants that may have been left after cleaning. Many of these won't be visible to the naked eye, and once applied you'll have a perfect surface for the ceramic coating to bond to.
Note - Ceramic coatings can be applied to bikes with a protective frame wrap such as Invisiframe or RideWrap.
3. Apply the ceramic coating
After shaking the bottle to activate the formula, add a few drops of the coating to a new clean rag and rub it onto the frame. Apply it sparingly and Muc-Off suggests starting at the highest point on the bike, and rubbing it on in a cross-hatch fashion with plenty of overlap.

2024 muc off ceramic coating kit rub.jpg, by Liam Mercer
Once the bike is covered with the ceramic coating, leave it to dry for at least five minutes.
4. Leave the bike to cure
Once your frame has that polished finish, don’t be tempted to ride it. The ceramic coating needs a day to cure, and the best policy is to wait two days for it to be properly set before going for a ride.
If you expect that ride to be muddy, it's best avoided as brands such as Gtechniq recommend that a coated bike isn't washed for at least seven days post-application.
How long will it last?
If you’ve prepared the frame properly and applied the ceramic coating with care, especially the buffing and curing aspects, it should last for up to two years. That can vary with how often a bike is washed and the conditions it's usually ridden through.
Are ceramic coatings worth it?
How much do you like the additional mass of frame mud accompanying you on a winter weekend ride? Exactly. While mud can still adhere to a bike with a coating, a ceramic coating’s hydrophobic effect reduces the amount of mud, which is great for keeping your bike lighter on a long winter ride.
The real advantage is that a ceramic coating reduces the cleaning burden after a ride. Like frame wraps, it’s a reasonably simple investment that can yield better long-term frame health and future resale value for your mountain or gravel bike.
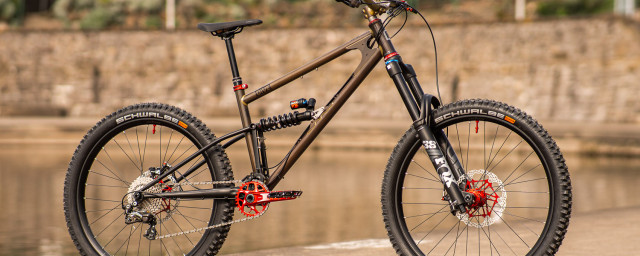
Winter, mud and suspension
When you’ve returned from a winter trail ride, it’s evident that your bike needs a rinse, wash, and wipe-down. However, the technique and depth of that cleaning routine can dramatically influence your potential future maintenance costs, especially on dual-suspension mountain bikes.

2023 bike clean hero.jpg, by Liam Mercer
The fine sedimentation and moisture content in mud can defeat even the best bearing and damper seals. Once it migrates past those seals, the mud, grit, and moisture can become a grinding paste, wearing down your suspension components.
To avoid increased wear on your stanchions, keep your seals clean after a ride with a wipe and use a suspension-specific lubricant to help free dirt from the seals, keeping them clean and smooth-running. Such products come from many brands such as Juice Lubes' Fork Juice, Muc-Off's Suspension Serum and Stans Biobased Forkboost.
Enhancing pivot-bearing life
Moisture and mud grit migration into your dual-suspension frame’s pivot bearings creates maintenance risk with rust. That moisture starts a corrosive reaction with your pivot bearings, which are steel. Ceramic bearings don’t have rust risk – but they are much more expensive than steel bearings.
One way of preventing moisture and mud grit migration into your pivot bearings is to gently but methodically clean them after rides. With some dual-suspension designs, this can be quite an involved process, as the linkages collect mud in difficult-to-reach areas. But with some soft- or medium- small bristle brushes, you can get into all those areas and get the majority of mud out.

Mudhugger Rear Mudguard-1.jpg, by Rachael Gurney
The best way is to stop mud from reaching those places. Despite being a fashion faux pas, rear mudguards aren't just for keeping your back dry – they also keep mud and water from your pivot bearings. This means less water and brushes being shoved into those sensitive areas.
Be wary of high-pressure washing
What you don’t want to do is overuse a pressure washer. It might be a quick way to displace all that mud trapped between the suspension linkages, but it’s also a sure way to ruin all kinds of bearings. Pressure washers will force some mud, grit, and moisture past the pivot seals while blasting away protective greases designed to repel water for greater bearing life.
The same logic applies to damper and fork stanchions.
Gentle water pressure is best
Don’t angle a pressure washer downward, and power rinse your fork or shock directly into the seals. All you’ll do is overwhelm the wiper seals and force corrosive moisture deeper into the fork or shock.
Gentle water pressure from a garden house will get the job done of rinsing mud from your fork and shock stanchions. And then, use a soft cloth to wipe everything clean.
Winter, steel frames and rust
The British steel hardtail is perhaps a winter rider’s most trustworthy partner. With generous rear triangle mud clearance and no linkages or pivots to worry about, there’s a terrific selection of progressive geometry steel hardtails that are authentically rewarding winter bikes.

2021 Stif squatch hero riding.jpg, by Liam Mercer
But steel bikes have rust risk. Trusted brands paint their frames to the highest standards and apply the appropriate internal coatings to guard against corrosion.
Although most steel hardtails feature external cable routing, true to their hardy ride-anything-anywhere purpose, some frame builders offer internal cable routing. Ensure the cable has a tight seal as it ports into your frame to prevent moisture seepage.
Resist the temptation of a raw finish. It might look great, having those weld colours and raw steel look as an aesthetic, but clear coats show creep rust. Even colour-painted frames develop creep rust, you just can't see it because it's under paint. However, if you're after a raw finish that'll stand the test of time, look towards stainless steel and titanium frames.
You might also like:
Author block