Six money-saving bike maintenance tips
Almost everything about mountain biking, gravel riding or cycling, in general, is pretty expensive. That goes for everything from buying a new bike to replacing components or a new helmet - it all adds up very quickly. It’s easy to forget your bike requires regular maintenance to keep it running its best, and its components lasting as long as possible. Taking your bike to your local bike shop or mechanic to sort simple tasks can become pretty expensive - so to help save you some hard-earned cash - here are six maintenance jobs you can do at home yourself.
- The best mountain bike helmets you can buy for under £100
- Best cheap mountain bikes 2023
- 10 pieces of essential mountain bike clothing for beginners
Before getting any further, if you’re not comfortable working on your bike, there’s absolutely no shame in that. Sometimes, biting the bullet and taking your bike to a mechanic can save you money in the long run as with some jobs, there’s no going back if you break a vital component, not to forget that new components can cost more than the work itself.
Before you start working on your bike, it's good to bear in mind that there are a number of tasks that are more advanced, such as replacing pivot bearings and full suspension servicing. These are jobs that a trained mechanic will do better than most home mechanics - and with little chance of something going badly wrong. Plus, mechanics and local bike shops are the lifeblood of our sport you’ll also help prop up our industry.
But then there are those tasks that you can easily do at home. Here, we’ll highlight those regular but easy-to-accomplish jobs that require little to no special tools.
1. Learn to change the brake pads
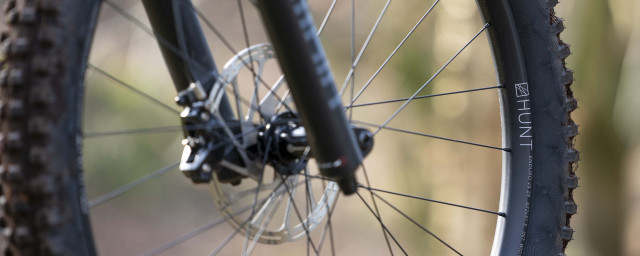
Over time, especially in wet and grimy conditions, brake pads wear out and worn brake pads won’t slow you down as effectively - if at all. To check the condition of your pads, simply look down from the top of your brake caliper, and if the material is flush with the pad spring, the time has come to swap them out for fresh units. If you feel you can't tell the state of the pads with the wheel on, simply take it off and you have a very good look at what's going on inside the calipes.
To replace your pads, simply remove any securing fasteners from the side end of the safety pin, unscrew the pin, pull out the old pads. There are two caliper pistons inside, moving the pads towards the rotor when the pads wear out, and to fit new pads in you might need to push these further in. You can do this by using a plastic tyre lever or something similarly soft - although there are dedicated tools for the job, as well. Just make sure to not brake the pistons as they are quite fragile and if you chip them, you're probably facing a trip to the bike shop. Once the pistons are done, slide the fresh pads in with a new spring, tighten up the bolt and replace the securing fastener.
Be careful not to touch the brake rotor or the pad’s material with your fingers, as any oils transferred from your skin to the pad will ruin its potential braking power and cause horrendous squealing from contamination.
A brake pad swap is also a great opportunity to inspect your brake caliper for any leaks or damage and to give those pistons a quick wipe-down before pushing them back in.
2. Learn how to bleed your brakes
While we’re on the subject of brakes, hydraulic brakes require bleeding on a regular basis. This will keep them running at their best because DOT fluid (used on SRAM brakes) can absorb moisture from the environment and mineral oil (used on most other hydraulic brakes) degrades over time. This will reduce braking power and ruin the feel of the brake lever.
To bleed your brakes, you will need a bleed kit for your specific brake configuration. They can be picked up for less than £20 and learning to bleed your brakes is a great chance to get to know your bike a bit better. Just make sure you're using the right fluid inside the brakes!
While bleeding your brakes may sound like a daunting task, it’s actually fairly straightforward as long as you correctly follow the steps. To help with that, we’ve got guides on how to bleed Shimano, Hope, TRP and Tektro hydraulic brakes, as well as how to bleed SRAM, Hayes and Magura brakes.
3. Learn to replace the cables
Even though the likes of SRAM, Shimano and Magura are doing away with cables altogether, many riders stick to what they know best - yes, cables. While reliable without the need for charging, cables stretch with use and, after some time, shifting and actuation performance isn’t anywhere near as crisp as it used to be.
If your shifting has become sluggish, or your dropper post’s actuation has become slow with the barrel adjuster wound all the way out, it’s time to replace those cables (if your dropper post is cable actuated).
With internal cable routing becoming ever more popular because of the sleek look it gives the bike, changing cables is slightly trickier than it used to be when all cabling was outside the bike. It's still one of the easiest at-home maintenance tasks, though!
You don't need to change your outer cable housing necessarily every time you change a cable, but in case a new cable doesn't seem to do the trick of improving your shifting, then you're needing new cable housing as well.
To do the process for outer cable routing, you first need to trim your cable outer to size, pop the ferrules on the ends, locate the ends of the outer in the cable stops and cable tie it down where necessary. Then, you will thread the shifter (or brake) cable through your shifter, into the cable outer and it will pop out at the derailleur end. Thread the cable inner around the securing bolt on the derailleur, nip up that bolt and you’re done.
With internal cable routing, you’ll have to be careful of how you remove the old cable and insert the new. You’ll need to first replace the inner cable and then the outer, using the inner as a guide - unless you have a tube-in-tube or cable guides built into your frame.
Now it’s time for the next step.
4. Learn how to index your gears
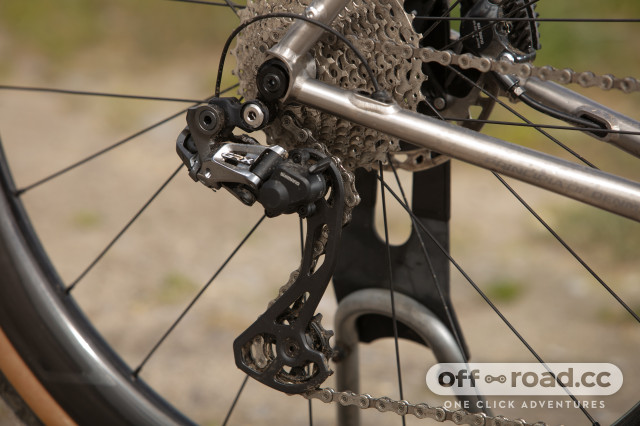
Simply put, indexing your gears is forcing your derailleur to work over a particular area, so it won’t jump off of the cassette either onto your wheel spokes or out to the frame. Indexing your gears requires the adjustment of cable tension and limiting your derailleur’s movement in order to achieve the crispest shifting - and none of that annoying in-between-gears rattling noise.
To start, you need to set your derailleurs limit screws so the derailleur doesn’t push the chain off of the cassette and into your frame or pull it into the spokes of your rear wheel. This is best done with your bike in a work stand and while pedalling.
Shift the derailleur into the hardest gear. You’ll then need to look to see if the upper jockey wheel is in line with the smallest cog. If it’s too far outwards, screw the outermost limit screw in, too far inboard and screw it out.
Once you’re happy with that, shift the bike into its easiest gear (biggest sprocket) and do the same. If the shifting still doesn't seem perfect, you might have a bent mech hanger. You can quite easily straighten the mech hanger with a specific tool - up to a point - or you need to replace it.
Next, it’s cable tension time and when installing your fresh cable, you should have tightened it into your derailleur finger tight with a full turn of adjustment at the shifter’s barrel adjuster. With the chain on the smallest sprocket, shift one gear up. If the chain hops up the cassette perfectly, repeat. If at any point the chain resists shifting, wind on more cable tension (turn the barrel adjuster away from the shifter) until the chain jumps nicely from one cog to another.
When you’re happy with that, shift down the cassette, and if there’s any resistance, wind some cable tension off (barrel adjuster towards the shifter). This just takes a bit of trial and error until you’re happy with the results.
5. Learn to replace your chain
Chains have got pretty darn expensive but, thankfully, they’re fairly straightforward to replace, especially if your existing chain already has the correct number of links. Keep an eye on the wear on your chain with a chain wear checker - those can be picked up for a few pounds and tell you exactly when your chain is needing to be changed.
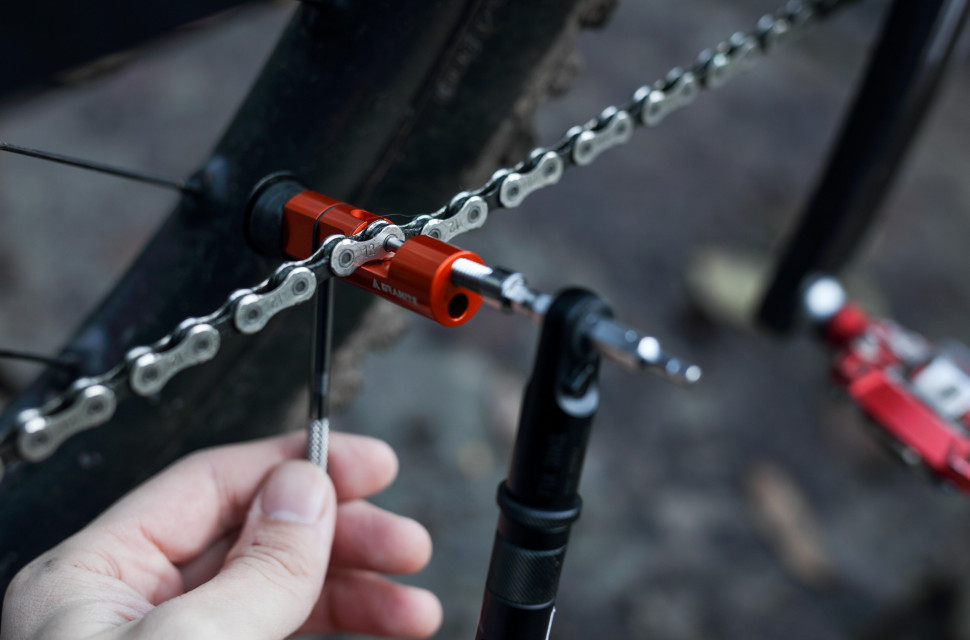
Using a pair of chain removal pliers (if your chain is joined using a power link or similar), undo the power link or with a chain tool break the chain. Then, lay your new chain next to the old one to check the length. Trim the new chain with your chain breaker if you need to, thread it through the derailleur and join the new chain with whichever method you have and you’re good to go.
Keeping tabs on your chain wear will help you squeeze every inch of life out of other drivetrain components. If you let your chain stretch too far, it will affect your cassette and chainring, which leads to much bigger replacement cost than a chain alone.
6. Learn to set up tubeless tyres/change your tyres
At off.road.cc we believe that everyone should be running their tyres tubeless. Ditching the tubes can change a bike’s handling for the better, benefiting from better grip, lower rolling resistance, more comfort, better puncture protection, and in most cases, a significant weight reduction. It’s a simple task to conquer, too, requiring no special tools, especially if your tyres and wheels are already tubeless ready as is the case with most new bikes these days.
If your rims are already taped and tubeless-ready, all you’ll need to do is rip out the tube, pop in a tubeless valve and the best tubeless sealant, inflate the tyre and you’re done. For a more in-depth guide, check out how to convert your tyres to tubeless - there is a chance that you might need to replace your rim tape for the tubeless setup to work perfectly.
The same process goes for changing your tyres: you simply pop the old one off with tyre levers and put a new one on. If you have non-clogged-up sealant inside the old tyre, you can pour it into the new one instead of flushing it down the drain.


