
How to store accessories and spare kit on a bike
Ditch the bag and ride packless with our top tips for on-the-bike storage.

Carrying essential tools, snacks and spares is vital to a great day out on the bike. Usually, that means utilising a backpack, hip pack or potentially dangerous kit in your pockets. However, that needn’t be the case as moving all of that kit out of a backpack and onto your bike poses numerous benefits. It can also improve your overall riding experience while offering new solutions to carry more should the need arise.
- How to set up your mountain bike suspension
- How to bleed SRAM, Hayes and Magura brakes
- How to service your shock - tips for both Fox and RockShox
Why store kit on your bike?
For big miles, riding with a proper backpack is an absolute must when covering greater distances as if something goes wrong, you'll need the tools and supplies to get going again. That is especially true if you’re riding a mountain bike that doesn’t provide many mounting points for bags and the like.
However, for many mountain bikers, distances don’t often stray too far from the car park or trailhead so ditching the pack can liberate the rider from lumbering weight and allow you to carry less in general. Not only does this reduce the almighty sweat patch that even the most breathable backpacks cause but it also frees up movement and manoeuvrability over the bike. Over larger distances, this also improves general comfort.

2023 trek slash storage.jpg, by Liam Mercer
And that’s a point that’ll be appreciated by gravel riders as reducing the number of things that can rub and cause discomfort over bigger miles will make for a more comfortable ride.
The same goes for bikepackers, too. So any clever method of carrying a multi-tool or similar in a way that doesn’t take up valuable space in a frame bag will open up that space for carrying other essentials. Kit that’s stored on your bike can become a permanent fixture, too. So if you’re anything like me and get lost in the faff of preparing kit the night before a ride, having items semi-permanently attached to your bike means fewer things to worry about or forget.
On-the-bike storage can also be more convenient. If a multi-tool is within easy reach, stored on your bike, that poses far less faff than having to unclip a backpack.
Consider what you’ll actually need
Before embarking on your on-bike storage journey, you’ll need to think about what you’ll need to bring with you. After all, space is limited on any bike frame, so taking everything but the kitchen sink won’t be possible. Generally, the bare minimum to carry is a multi-tool, some method of tyre inflation, puncture repair and hydration supplies.

2020 trail essentials small.jpg, by Liam Mercer
You can take things a little further by choosing to carry a spare inner tube or tyre levers and there are clever ways of doing that. But from a mountain biker’s perspective, the less you can carry without totally compromising your repair capability, the better.
There are so many ways of storing tools on your bike that you can tailor what you carry and organise where it’s located on your bike. Generally, having a semi-permanently minimalist kit setup means that you can easily build on it as and when the time comes.
The bottle cage is king
Where bottle cages have somewhat waned in popularity in favour of hydration packs, the idea is making a serious comeback because it takes the weight of the heaviest thing you can carry off of your shoulders. The bottle cage is expected on any new mountain bike and almost all new bikes are designed around adequately having space for two within the frame triangle.

2022 syncros iS multitool 2.jpg, by Liam Mercer
There are many bottle cage solutions on the market but they all do the same thing in different ways and come in all shapes, sizes and weights. For the user, it’s all down to clearance and whether it rubs your frame or shock when the bottle is in place. The route length and weather will also dictate the size of the bottle you’ll need to carry and the hotter it is, the more you’ll drink and the larger a vessel you’ll need.
A bottle cage probably isn’t the most exciting thing you’ll buy for your bike but brands are creating ways of storing tools in and around your bottle cage – this usually takes the form of an additional bracket to house items such as a mini bike pump.
There are cages from brands such Syncros that come with multi-tools built in and Topeak with its Ninja system allows users to attach miniature toolboxes. By adding one of these to your roster, you’re already sorted for a range of bike-repair scenarios.
Use the negative space on your bike
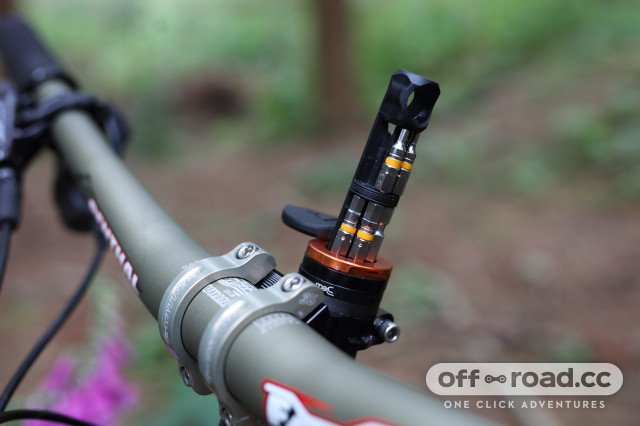
Three areas on most bikes are left mostly empty; the steerer tube, handlebar ends and the crank axle – and brands are capitalising on that space by creating neat tools that fit these areas.
OneUp Components pioneered steerer tube multi-tool storage with the EDC (Every Day Carry) tool. It acts as a star-fangled nut, applying preload onto a bike’s headset bearings while providing easy access to a comprehensive multi-tool, a tyre lever and a chain tool – so a complete multi-tool but in a compact and generally unused area.
2022 granite design stash rt open 2.jpg, by Liam Mercer
Other brands are doing similar things, too, such as Specialized with its SWAT tool and Granite Design with the Stash RT.

2021 muc off stealth tubeless puncture plug.jpg, by Liam Mercer
The ends of a handlebar have become a popular place for the tidy and inconspicuous storage of other tools and mostly tubeless tyre repair kits. Then the crank axle can be used as another area where a multi-tool can be stored. This is all food for thought for anyone looking to shift gear onto their bikes.
Make the most of your bike’s existing on-bike storage solutions
Modern off-road bikes are equipped with downtube storage straight from the factory, making storing kit on your bike as easy as possible. Brands such as Canyon and YT Industries offer a special tool wrap that can house a full tubeless repair kit including a tube, CO2 canister and inflator all within the Spectral’s and Jeffsy’s downtube.

2023 yt jeffsy core 5 door.jpg, by Liam Mercer
Systems like this enable the rider to carry even more than the bare essentials, such as small waterproof jackets and nutrition, without having to load their pockets.
Accessory mounts are also becoming commonplace on all kinds of mountain bikes. These allow the rider to hard-mount gear straps and similar methods of tool storage onto their bikes more permanently. With this in mind, it’s clear that the industry is reacting to the demand for increased packless riding.

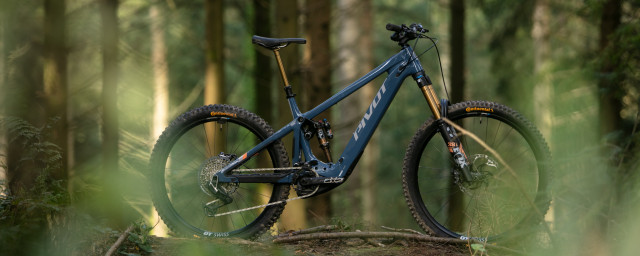
2024 pivot switchblade dock.png, by Liam Mercer
Does the extra weight affect bike handling?
Moving stuff from a bag and onto your bike adds weight to the bike. However, unless you’re fully loading your bike for an adventure in the hills, the extra weight does little to mess with how your bike handles.
If you’re carrying only the essentials, it’s not likely that you’ll notice the extra weight. The heaviest thing you’ll be adding to your bike is a bottle of water. However, if it’s not on your bike, it’ll be in a backpack, so you’ll be weighed down by it regardless of where it sits.

2024 merida eonesixty riding 3.jpg, by Liam Mercer
Moving stuff out of a bag and onto your bike can improve your handling of the bike. That’s because nothing is there to flap about on your back or interfere with your centre of gravity and weight distribution as you negotiate trails, land drops and ride steep sections.
You might also like:
Author block


1 comments
Can't seem to comment on any articles.... This tests again